Turn Any Building Into an Isometric Tile with Flux Kontext on Scenario
A 4-step guide to training a Flux Kontext LoRA that converts any building photo into a clean, consistent isometric tile style using one simple prompt.
Turn Any Building Into an Isometric Tile with Flux Kontext on Scenario
If you want a reliable way to turn any building photo into a clean, isometric tile, this guide shows the complete workflow.
You’ll learn how to train a Flux Kontext LoRA that converts real‑world building photos into consistent isometric tiles. By the end, you’ll have a reusable model that applies your style to any new photo, with just one short prompt.

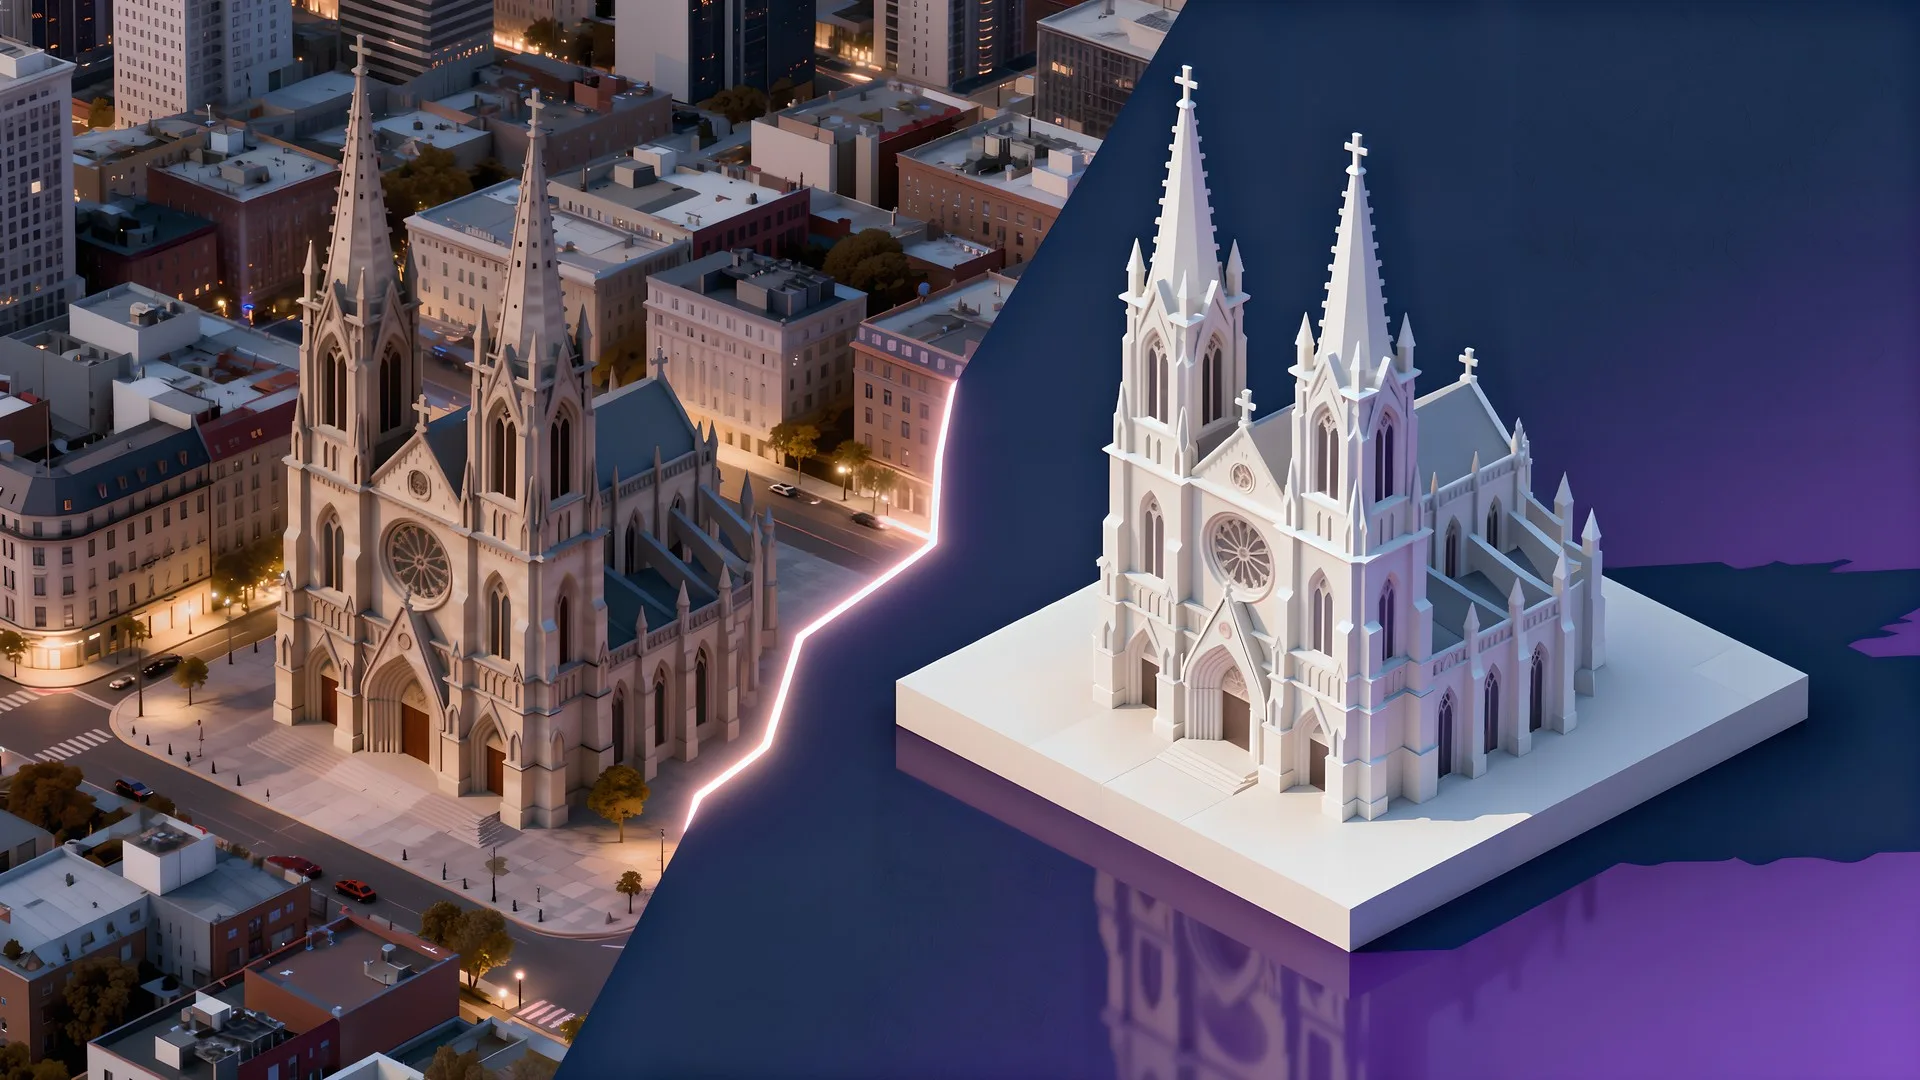
Consistent Isometric Tiles made with a Flux Kontext LoRA
Why Flux Kontext
Editing models like GPT Image, Gemini or Seedream often produce strong results. However, when you need the same look across many different images, style can start to drift. Small changes lead to inconsistent color, lighting and details from image to image. To get repeatable results, you need a workflow that does two things:
1) Pins down the exact transformation you want,
2) Teaches a model to perform that transformation the same way every time.
That’s where custom training comes in.
A Flux Kontext LoRA is trained on before/after pairs with one stable instruction, so it learns the action itself. That action‑centric setup locks structure and style, letting the same short instruction produce predictable, production‑ready tiles across many inputs with far less prompt tuning and cleanup.
Here, the action is to turn a photograph of a building into an isometric 3D tile. Once the model is trained, you can keep using the same instruction or another one similar to it, and get the same overall style across very different inputs. Think of it as training a precise editor that performs one transformation with consistency.

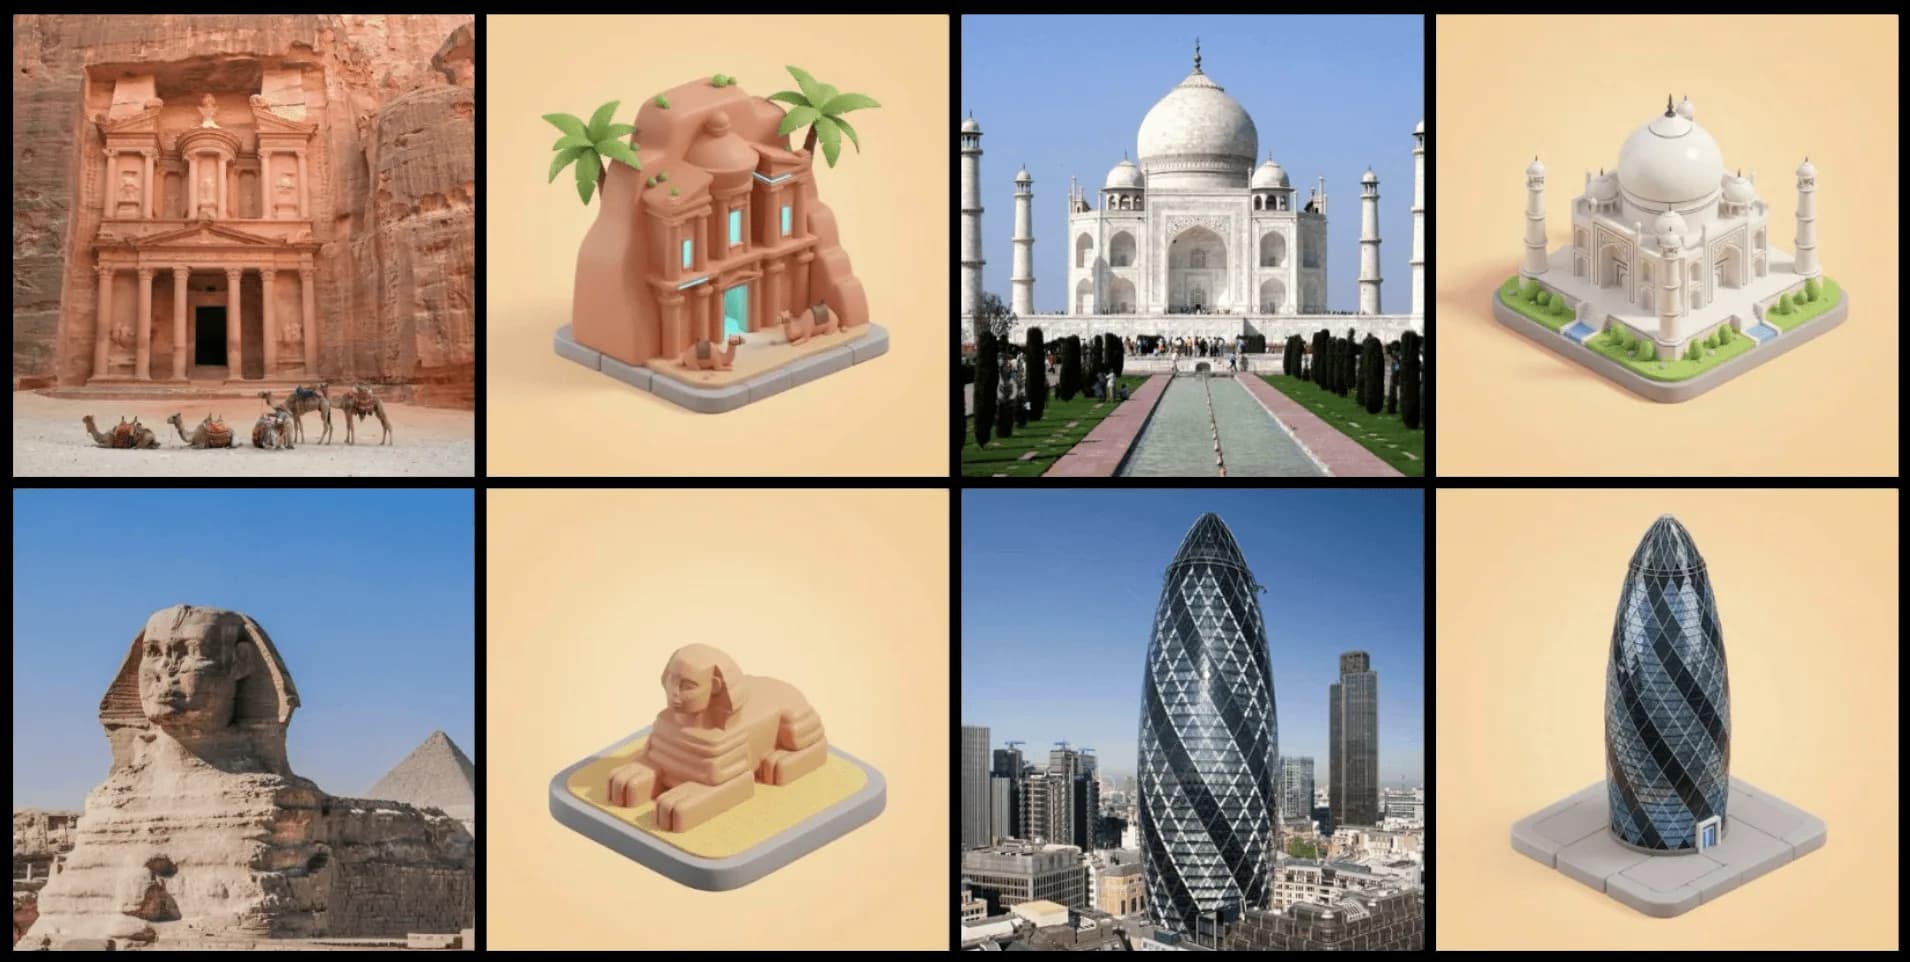
Comparison Between Flux Kontext LoRA and GPT, Seedream and Gemini
How to do it in four steps
Step 1: Prepare your before/after pairs
Collect 10 to 20 before/after pairs that highlight a clear and focused transformation. Try to use high-quality visuals (1024×1024 or higher) with clean details.
In this case, the “before” is a standard building photo. The “after” is the same subject as a clean isometric tile. Open Scenario and choose “Create“ from the top main menu, then click Train, Start Training > Kontext.
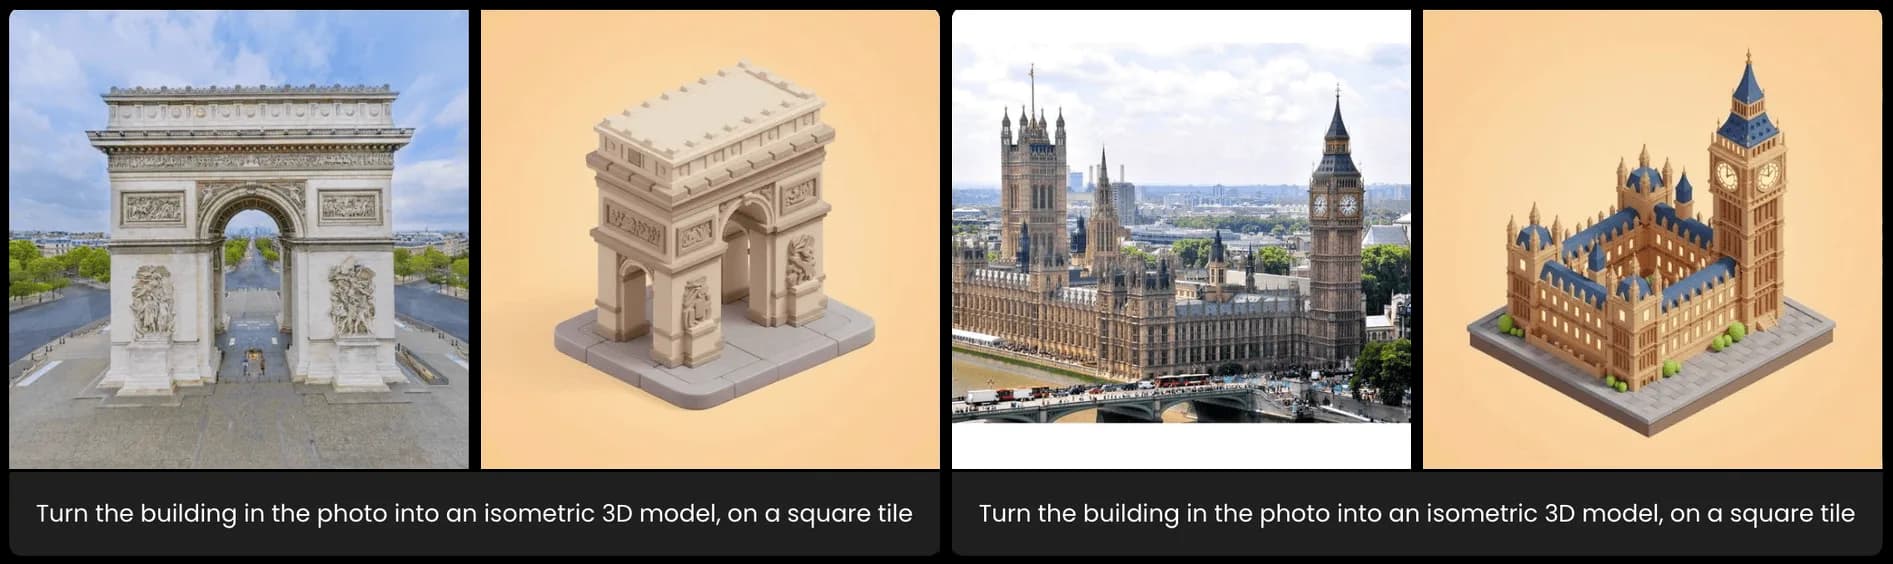
Before/After Isometric Pairs For Flux Kontext LoRA Model Training
Step 2: Add pairs and instructions
Upload your pairs, then drag and drop each input and output image into their assigned slot and use a single, short instruction that describes the transformation for all of them: “Turn the building in the photo into an isometric 3D model, on a square tile.”
Keep the same wording for every pair. That consistency helps the LoRA learn the exact action.
Pairs and Instructions For Flux Kontext LoRA Model Training
Step 3: Add test pairs to judge progress
Use up to four test slots to add a few test pairs. For each slot, upload a new input image that is not in your training set and provide a short instruction that closely mirrors the one used in training.
This lets you monitor progress across epochs so you can later compare them and pick the best version as training progresses.
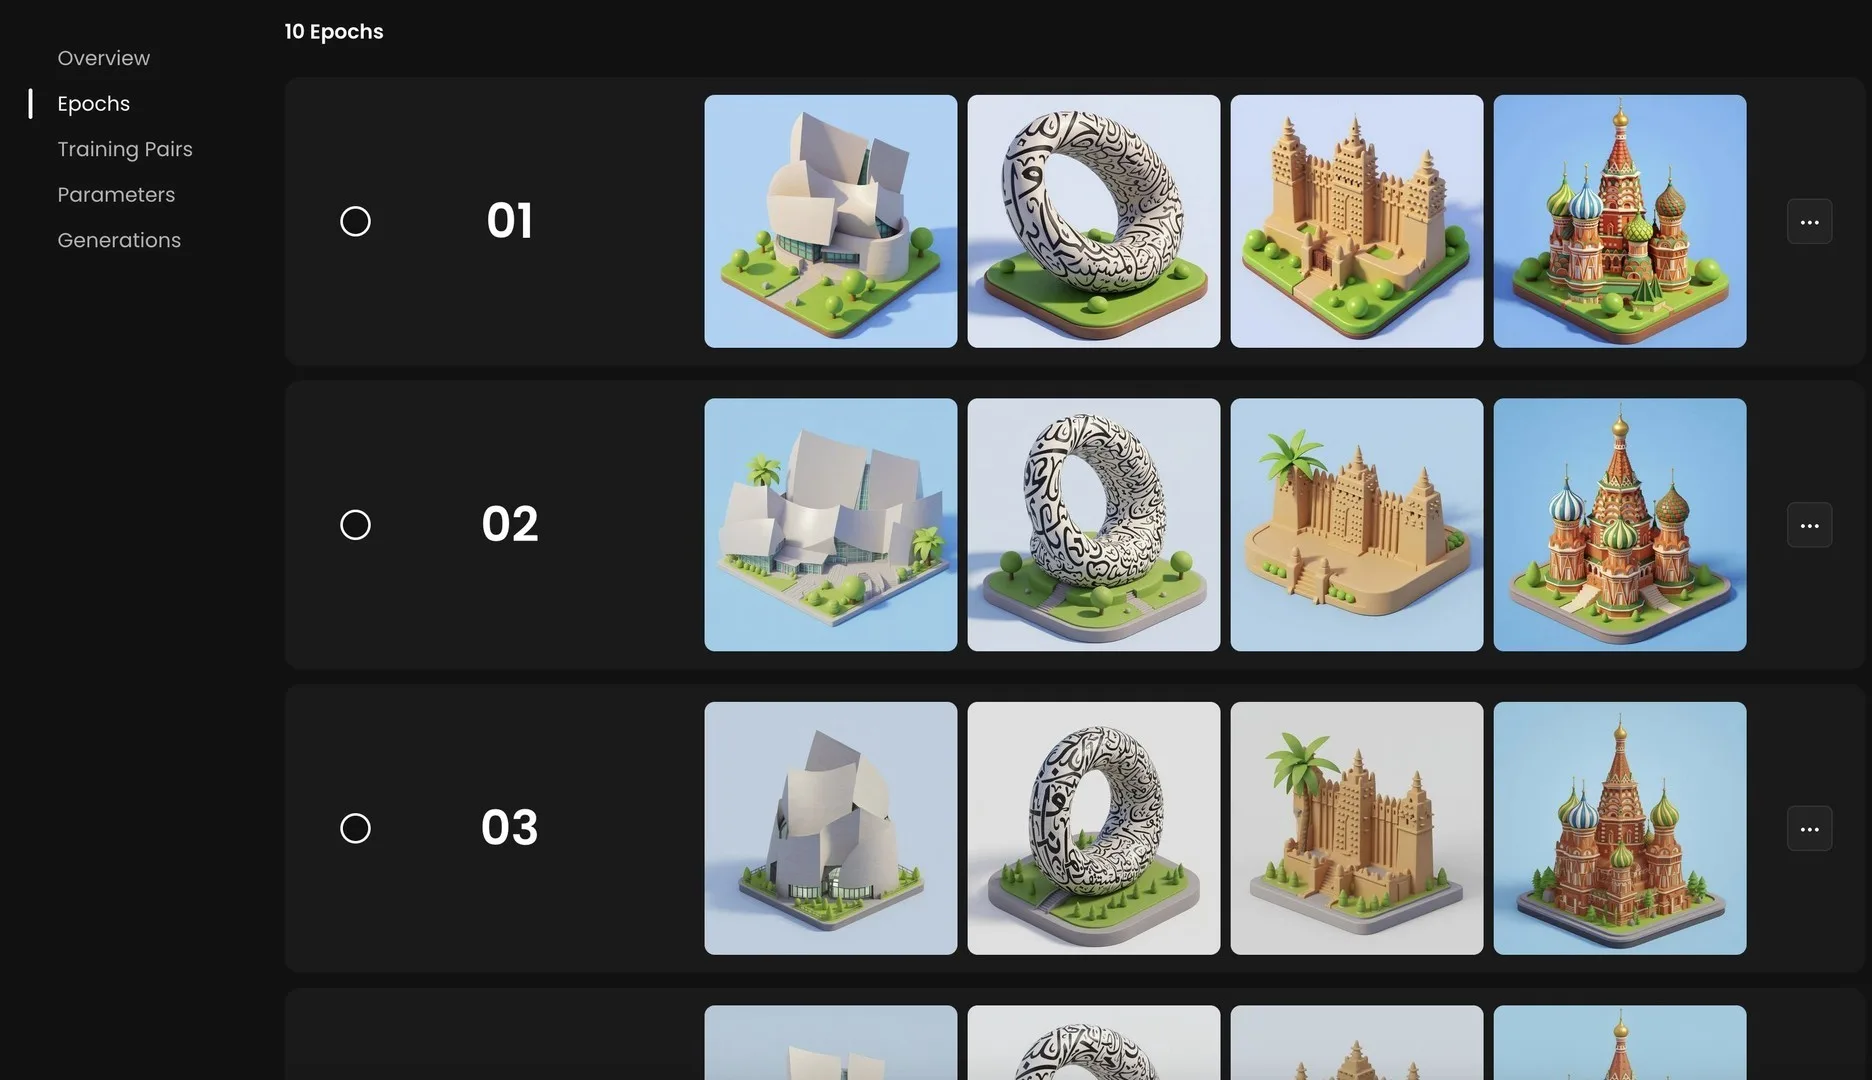
Different Epochs During Flux Kontext LoRA Training
Step 4: Train, then use your model
Click Train. It typically takes 30–45 minutes to a few hours depending on dataset size and settings. When it finishes, simply click “Use This Model”, or go to the “Edit with Prompts“ interface, and load the model into the panel on the left.
Upload any new photo and enter an instruction that matches your caption style.
You should now get the same clean, isometric style each time.
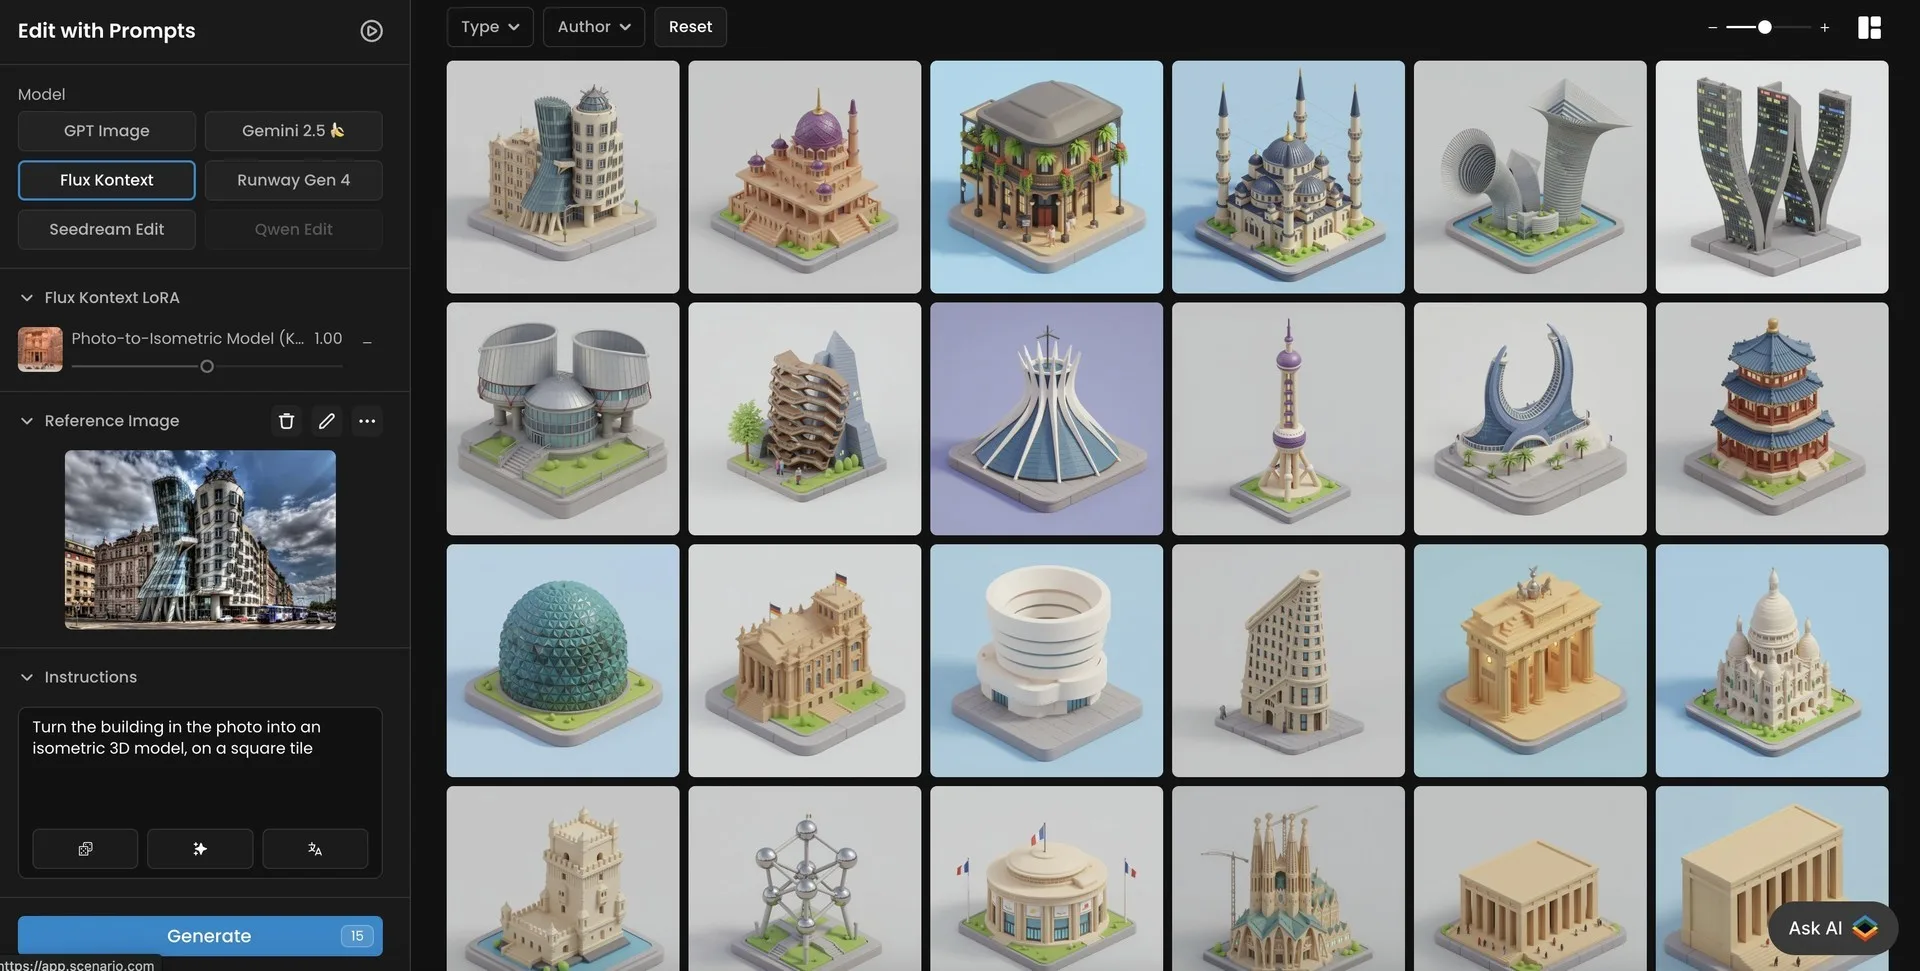
Flux Kontext LoRA Trained To Transform Buildings Into Isometric Version
Results to expect
After training, you can expect a consistent style across different buildings.
Prompt tuning becomes minimal, and producing large sets of tiles becomes faster.
Conclusion
This approach works well for city‑builder kits, modular packs, UI icon systems, and any pipeline that needs uniform tiles from real‑world references.
If your goal is consistent, production‑ready isometric tiles from real‑world photos, Flux Kontext LoRA gives you that control. Keep the transformation clear and train on clean before/after pairs with one instruction. From there, every new building photo becomes a predictable tile you can use.
Get started in Scenario: Open Flux Kontext
Frequently asked questions (FAQs)
How many pairs do I really need for a Flux Kontext LoRA?
Ten to twenty good pairs are usually enough when the transformation is clear and consistent. More is helpful if your inputs vary a lot in lighting or composition.
Can I mix different architectural styles in one LoRA?
Yes, as long as the action stays the same. If the target look changes significantly, consider training separate LoRAs for each style family.
Do I have to keep the exact same wording for the instruction?
Small wording changes are fine, but keeping a stable instruction during training and inference improves consistency.
How do I choose the best epoch?
Use held‑out test pairs, compare a few epochs, and pick the one that balances fidelity to the action and cleanliness of the isometric result.
Can I batch process a folder of building photos?
Yes. Once trained, apply the same prompt and LoRA in a batch workflow to generate a full set of tiles with uniform styling.