From Prompt to PBR: Texture Generation in Scenario
A practical guide to creating seamless textures in Scenario, from model choice and prompting to 3D preview and full PBR export.

From Prompt to PBR: Texture Generation in Scenario
Textures define how a surface feels. They hold the fine details that make wood look like wood, stone like stone, and metal like metal. Good textures bring objects together and make a scene feel designed, not just assembled.
This guide walks you through Scenario’s texture generation workflow, from idea to production. You’ll learn how to choose your model, write prompts that capture your desired look, review results in the live 3D viewer across shapes and lighting, and export a complete set of PBR maps.
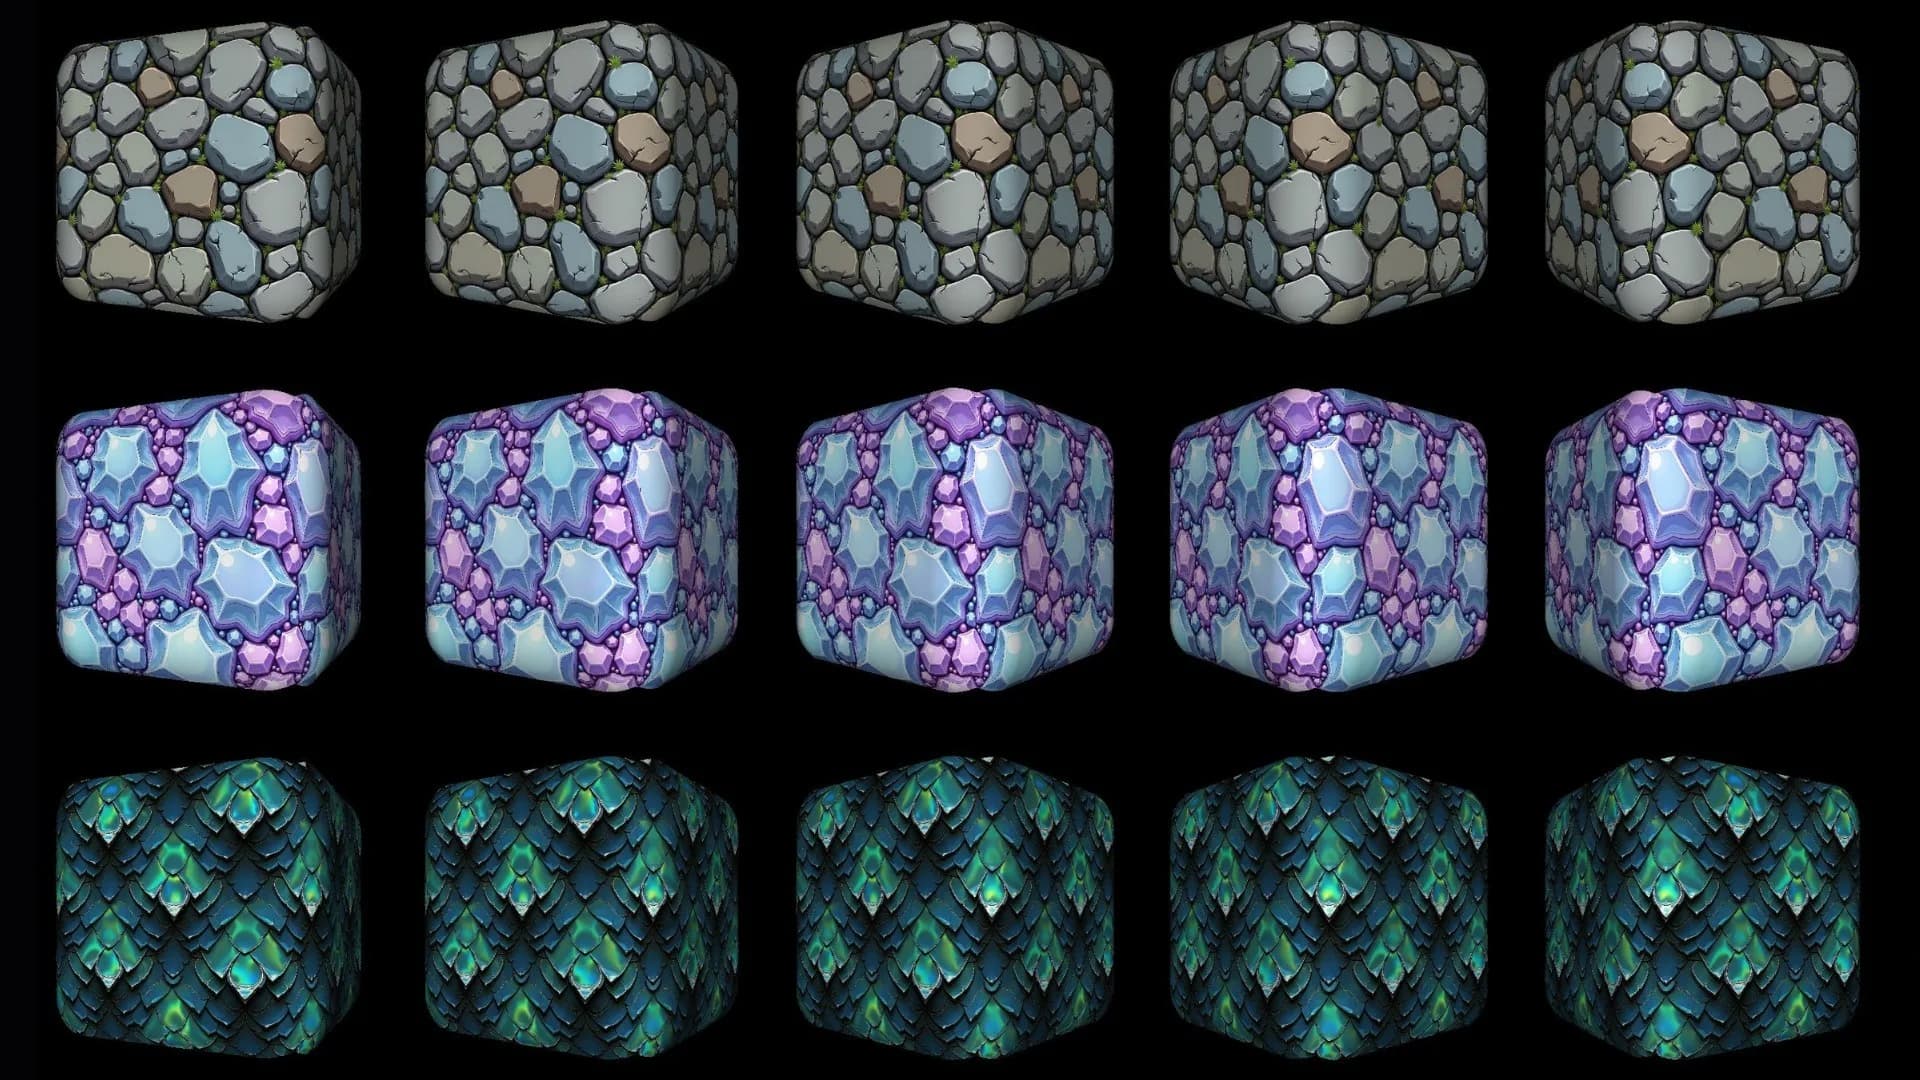
A Variety of Textures Generated on Scenario
The 3-Steps Workflow
Step 1: Open Texture Generation
Open the texture generation interface in Scenario from the top main menu under Create then Textures.
Step 2: Pick a model and write one clear prompt
Choose a model that fits your goal. There’s a variety to choose from, allowing you to match the style or material you need.
From wood floors to stone walls and roof tiles, you’ll find ready models for most materials. For a fully personalized result, train your own texture model with 10–30 examples in your own style.
After selecting your model, describe the look and surface details you want in your prompt. For example: an ancient stone wall made of large, weathered limestone blocks, eroded in gray and sandy tones, with moss growing between the joints.
Step 3: Preview in 3D, then generate maps
Create the albedo, then open the result in the 3D Viewer.
Try switching between sphere, plane, cube, and cylinder geometry to spot potential surface issues. You can also adjust the metallic and roughness values to observe how light and highlights behave.
If the surface looks too noisy or too soft, refine it with the shaping controls. Raised adds depth cues, Shiny increases specular highlights, Polished smooths out busy areas, and Angular sharpens edges for a cleaner read.
Once the base texture looks right, click Generate Maps to create the height, normal, metallic, edge, and ambient occlusion maps.
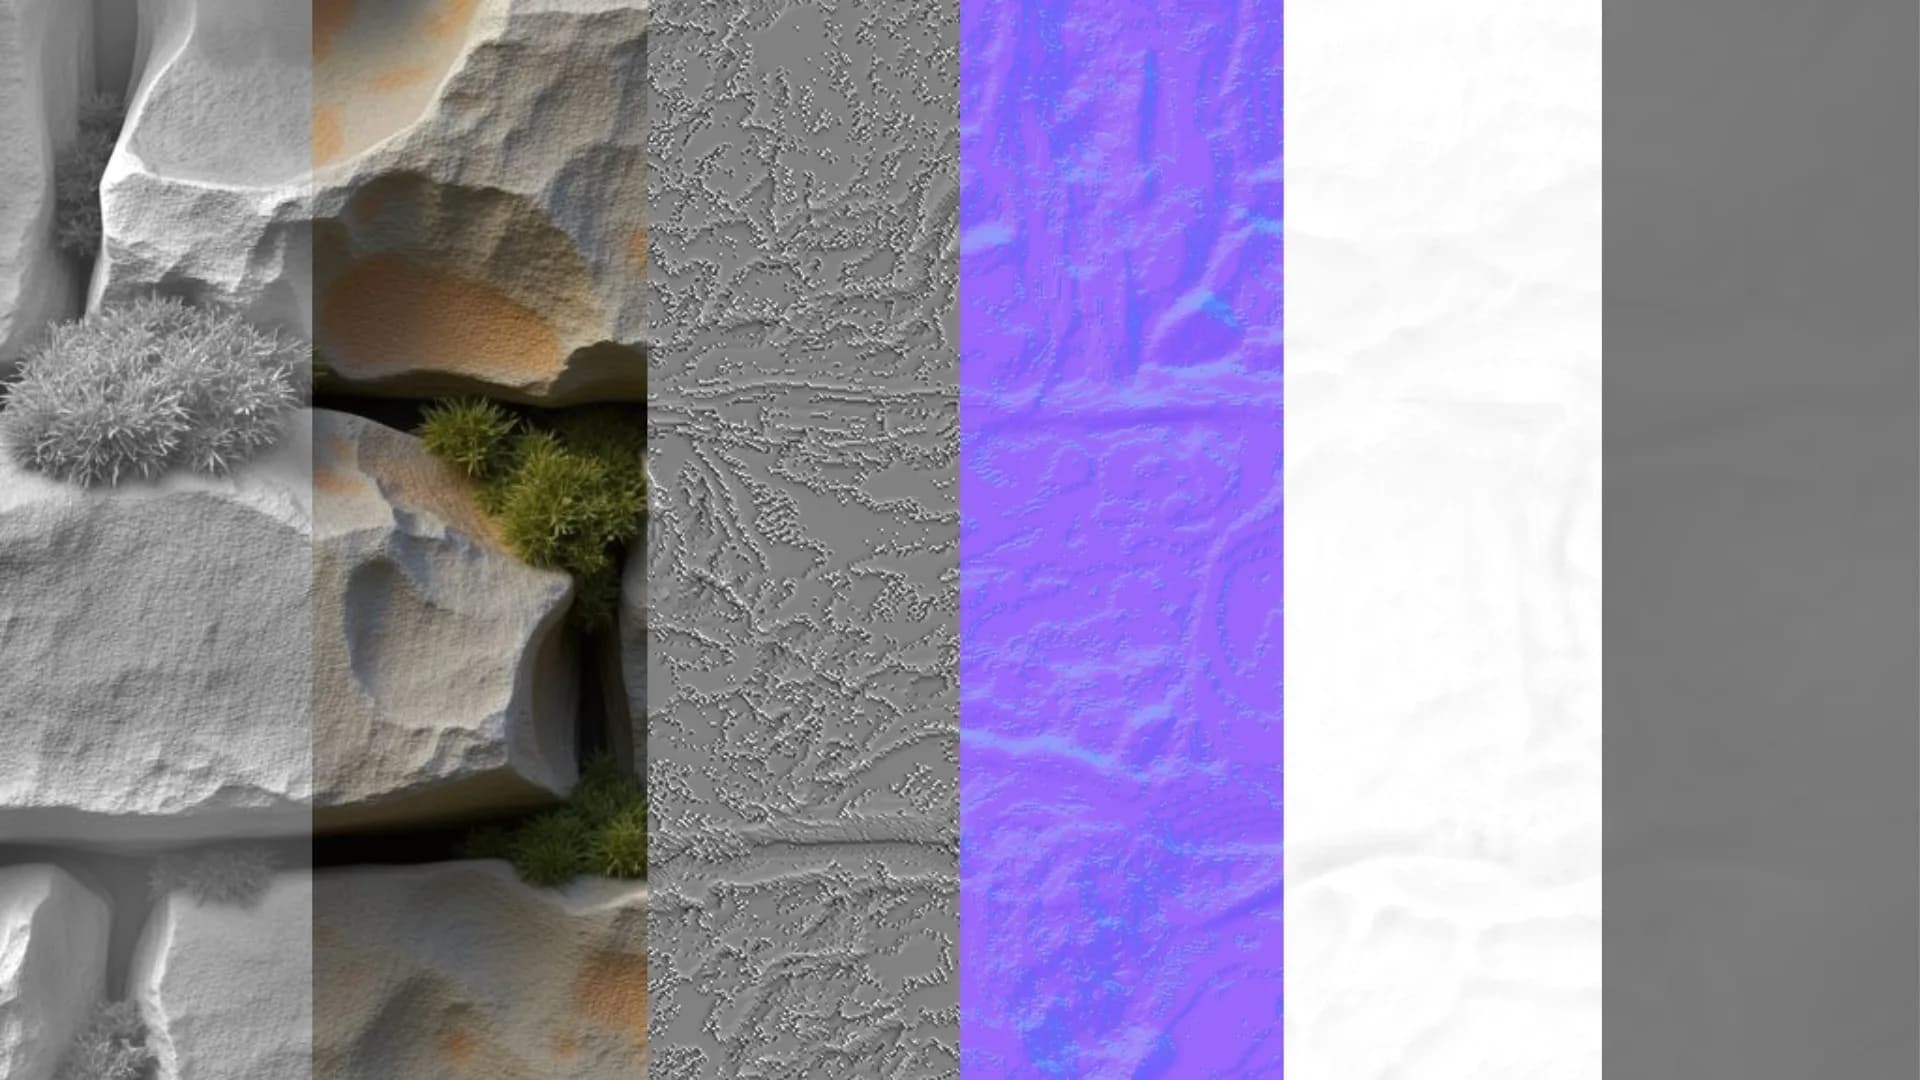
PBR Texture Maps Generated on Scenario
Results to expect
With a clear prompt and a matching model, you get textures that tile cleanly and hold up under different lights and shapes. Prompt tuning stays minimal, and turning one texture into a full set becomes a quick, repeatable step.
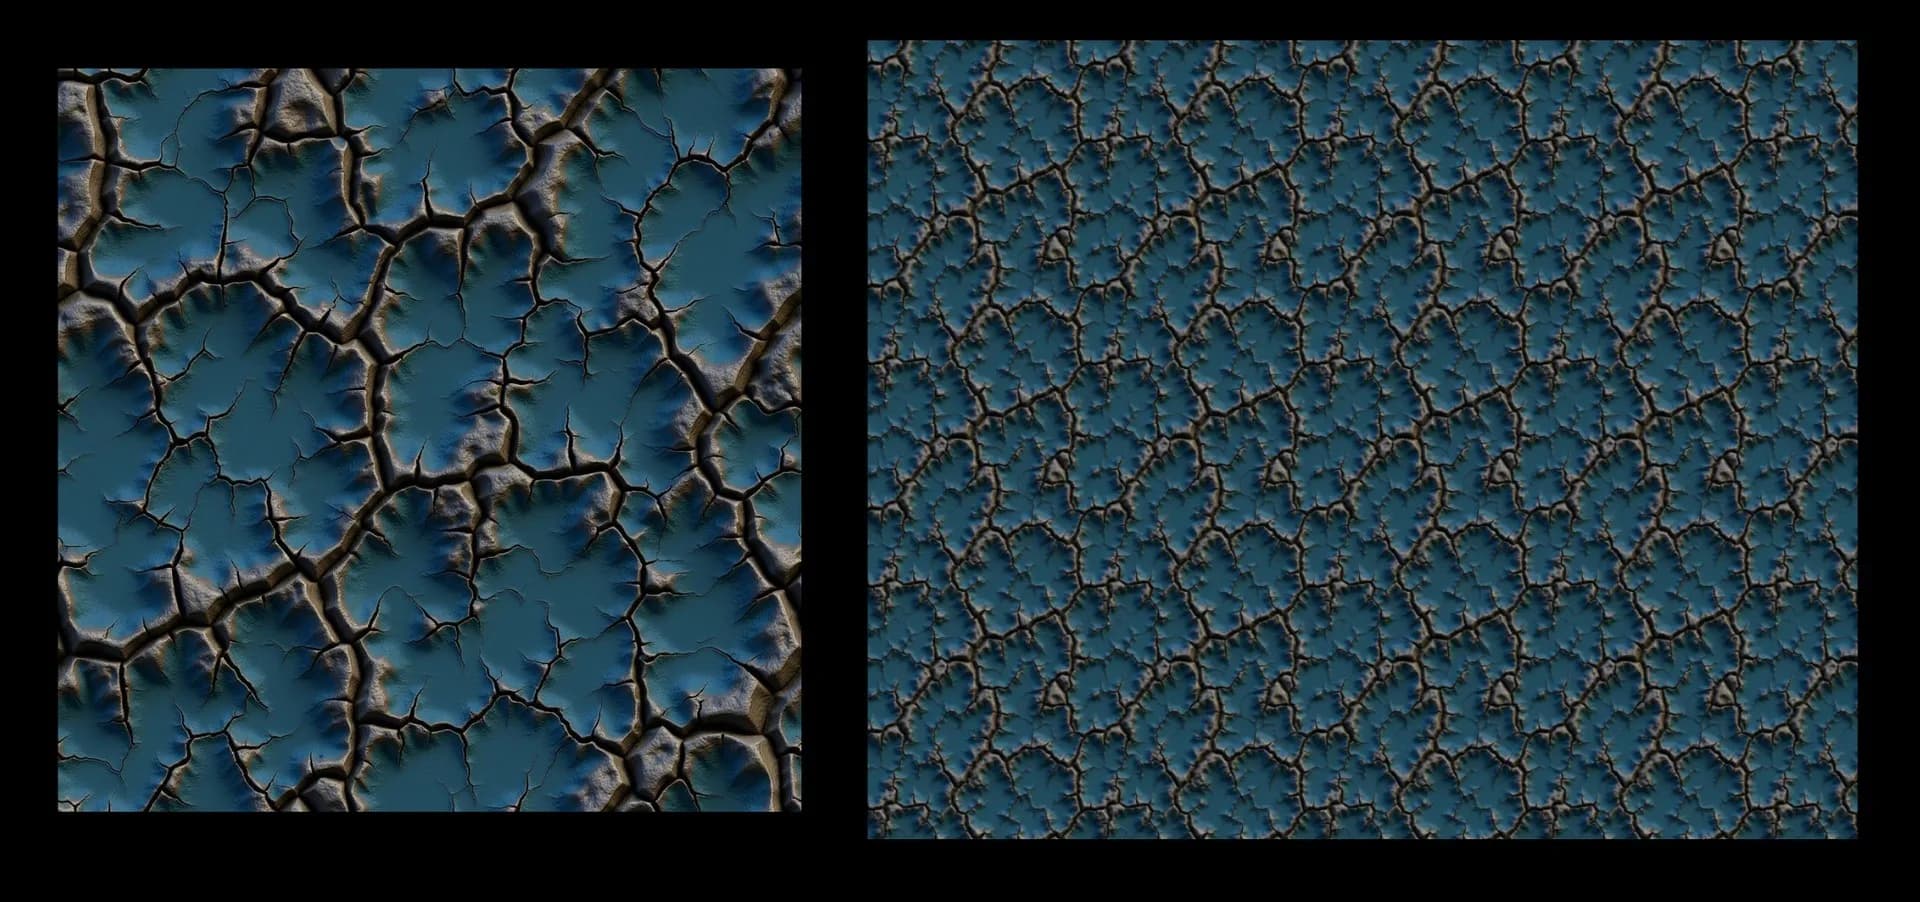
Original Texture Generated on Scenario Alongside Its Seamless Repeatable Version
Two quick examples
Hand carved ancient stone wall
Using the Hand Painted Textures model.
Prompt: A hand-carved ancient stone wall texture, featuring irregular block patterns in varying shades of aged gray and moss-green, with subtle cracks and weathered details that reflect a historic, timeworn surface.
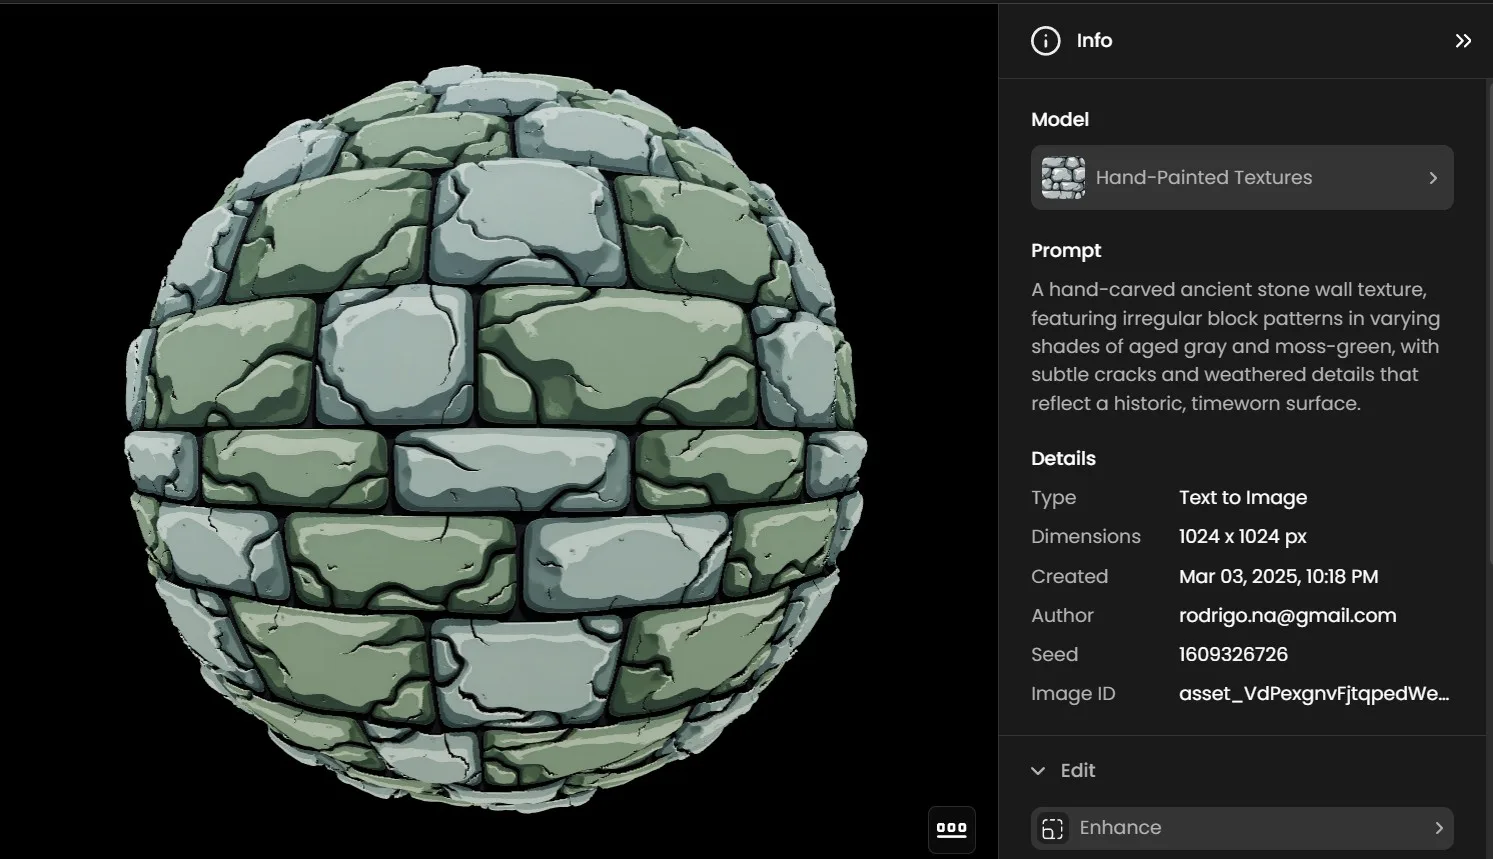
Ancient Stone Wall Texture
Weathered wooden fence
Using the Realistic Textures 2.0 model.
Prompt: A weathered fence texture featuring rough, splintered wood in faded tan and gray hues. The planks show signs of warping with frayed edges and natural grain patterns enhanced by sun and rain exposure, evoking a rustic countryside ambiance.
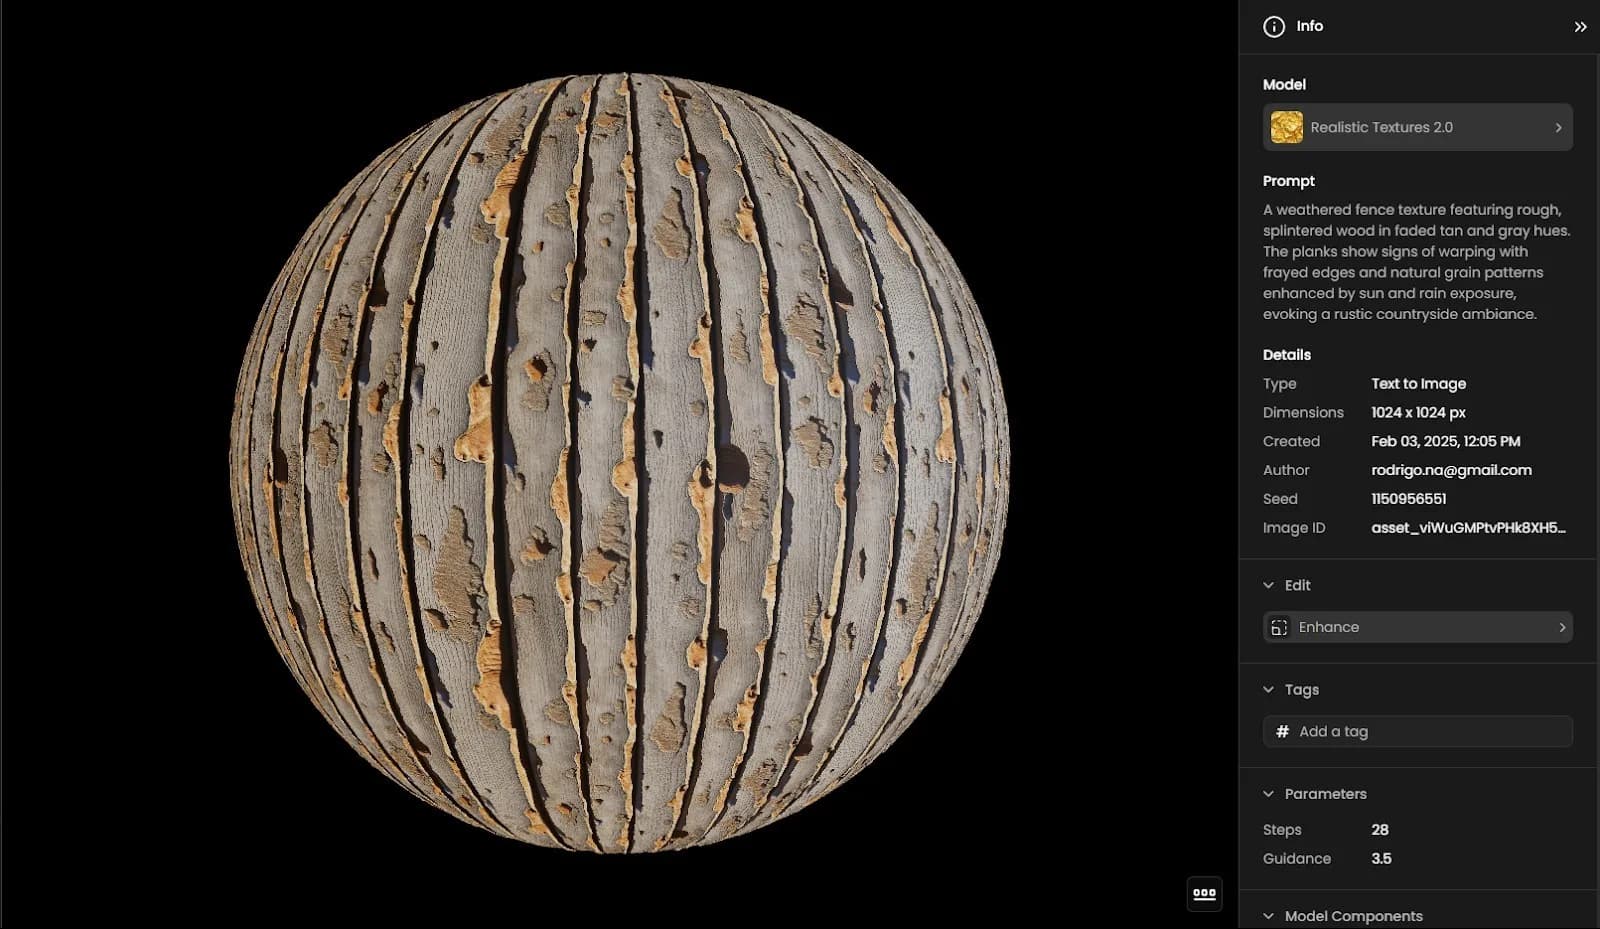
Weathered Wooden Fence Texture
For a step-by-step demonstration, watch our dedicated walkthrough on Texture generation.
Conclusion
To get strong, high-quality textures, start by knowing exactly what material you’re aiming for and testing your results quickly.
Choose a Scenario texture model that fits the look you want, write a focused prompt, and preview it across different geometry and lighting in the live 3D viewer. Once it feels right, export your PBR maps.
Scenario keeps this loop tight and intuitive, so you can focus on building, not troubleshooting materials.
Start generating your textures today: Open Scenario.
If you’re new to texture generation, you can read more about it in our knowledge base.
Frequently asked questions (FAQ)
How do I choose the right model for my material?
Pick a model that matches your target surface. Use specialized options for common materials like wood floors, stone walls, or roof tiles. For a signature look, train your own texture model.
What’s the best way to write prompts for consistent, tileable textures?
Write one clear, concrete prompt that names the material, the key visual traits, and the mood or wear level. Once you see a look you want to keep, fix the Seed to make variations and map generation predictable.
How should I validate results before exporting?
Open the albedo in the 3D Viewer and swap geometry between sphere, plane, cube, and cylinder to catch issues from different angles and highlights. Tweak shaping controls if needed.
When do I generate PBR maps and which ones are included?
Generate maps once the base texture reads correctly under varied lighting and shapes. Scenario produces height, normal, metallic, edge, and ambient occlusion so you can take a full PBR set straight into your engine or DCC.