Generate Turnarounds in Scenario: Consistent Multi‑View Characters
Create professional character turnarounds in Scenario without redrawing each view. Use Edit with Prompts, Pixverse v5's 360° effect, or custom‑trained character models with ControlNet for precise, consistent front, side, and back views.
Generate Turnarounds in Scenario: Consistent Multi-View Characters
Creating character turnarounds used to mean redrawing the same design from multiple angles and trying to keep every detail aligned. With Scenario, you can generate consistent front, side, and back views in minutes, no repainting and no guesswork.
In this guide, we break down three practical workflows, moving from fastest to most precise, so you can pick the path that fits your goal, then finish with light retouching and an upscale for a production-ready sheet.
Why character turnarounds matter
Turnarounds are the backbone of production because they lock proportions, outfits, and silhouette so the character reads the same from every angle.
That reliability makes them ideal for model sheets, smooth handoffs to 2D animation or 3D modeling, and clean stills for pitch decks and marketing.
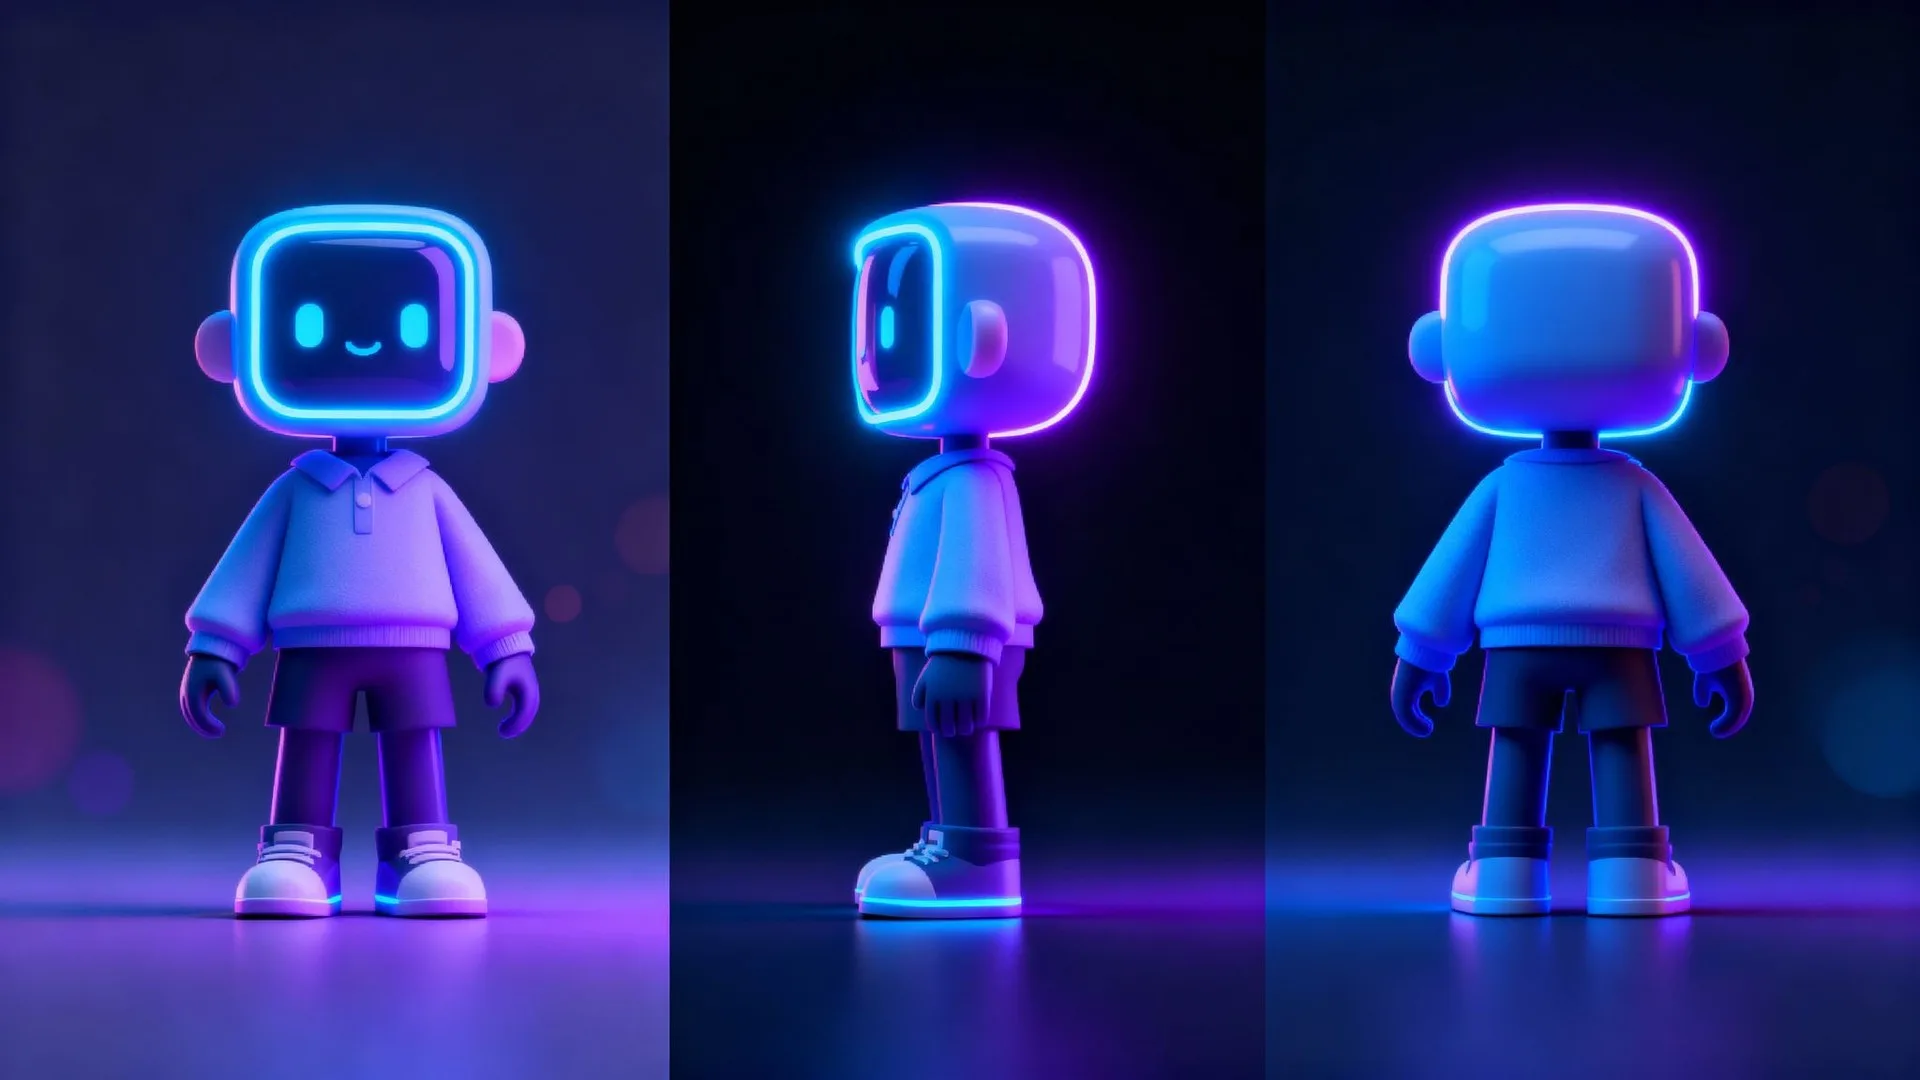
Workflow 1: Edit with Prompts
Best for fast results when you already have a strong base image.
- Open your base character image and select Edit with Prompt.
- Choose your model. You have the options between Gemini 2.5 (Nano Banana ), Flux Kontext, GPT, Seedream Edit and Runway Gen4.
- Write an instruction: "Create a character turnaround with front, side, and back views."
- Generate and review.
Use this when you want quick alternates without pose setup and you have a solid reference image.
Try it: Edit with Prompts
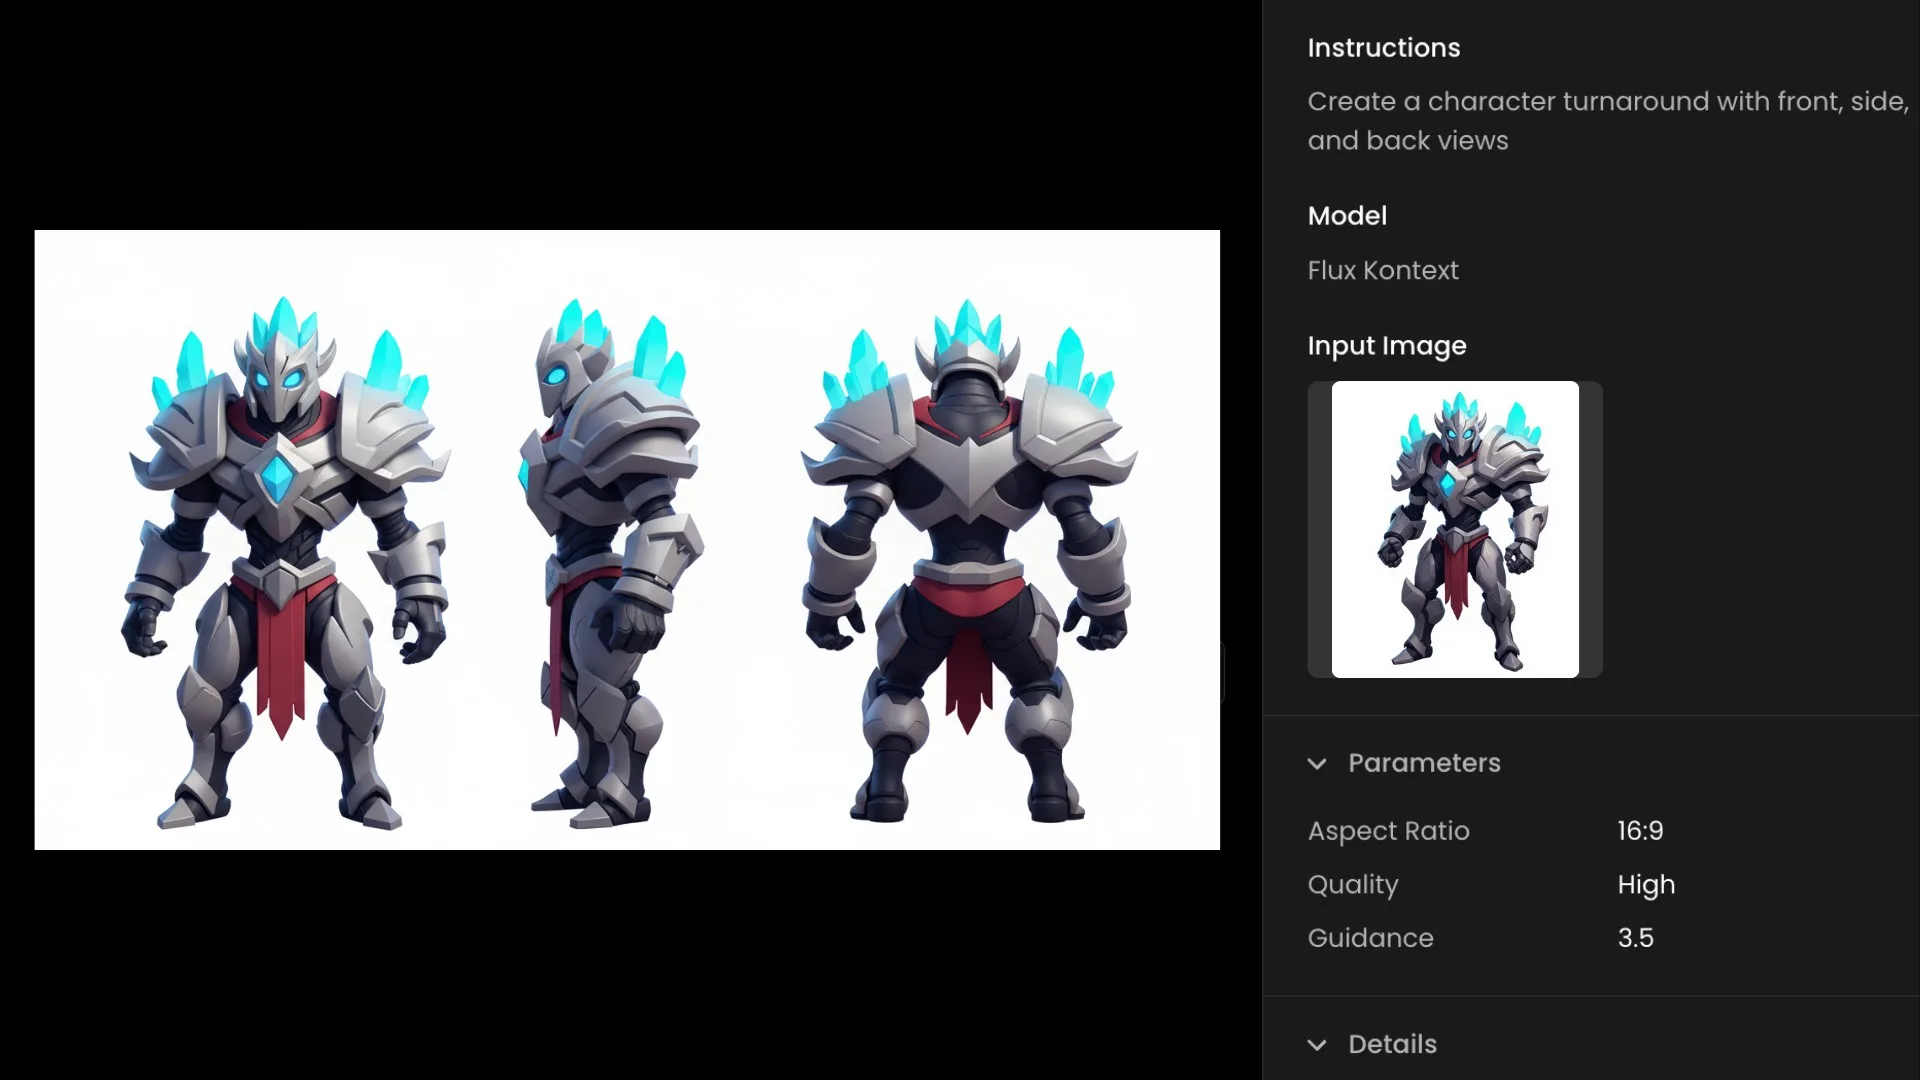
Edit with Prompts Character Turnaround Workflow With Flux Kontext On Scenario
Workflow 2: Pixverse v5 rotation capture
Use Pixverse v5 with the 360 degree Microwave effect to generate a smooth rotation and grab perfectly aligned stills for your sheet.
Steps
- Select Pixverse v5 in Video Generation
- Scroll down to Effects in the settings panel and choose "360° Microwave"
- Generate a ~5 second clip
- Export the best front, side, and back frames
When to use: Choose this when you want matched camera angles without manual pose setup and you also want a short 360 video for presentations or marketing.
Try it: Pixverse v5
Workflow 3: Custom‑trained models
Pick your model
Choose a custom character model when you need the same character to appear correctly across angles. Choose a style model when you only need a consistent look and can tolerate some identity variance across poses.
Option 1: Sketch your own reference (Image‑to‑Image mode)
If you do not have a turnaround reference, create one directly inside Scenario. Sketch a rough outline of the character in different poses such as front, side, and back; the drawing does not need to be detailed.
Apply the sketch as a Reference Image and adjust the Image‑to‑Image influence slider to control how closely the AI follows the sketch; a higher value keeps the structure more rigid, while a lower value allows for some AI interpretation.
Adjust your prompt to describe the character's appearance and actions.
For example: "Character sheet of a female character with vibrant messy short bob red hair and bright blue eyes, wearing a dark navy blue tactical suit with silver accents on the shoulders, front view with arms on her sides, back view with arms raised, and side profile standing straight"

Sketch your own reference (Image‑to‑Image mode) for Character Turnarounds
Option 2: ControlNet Pose mode
If you already have a turnaround reference, upload it instead of sketching. For structured turnarounds, a grid‑style reference with front, side, and back views works best. Using a reference, whether sketched or uploaded, gives the AI a structural foundation for accurate turnarounds.
For precise pose consistency, enable ControlNet in Pose mode before generating images. This ensures each angle maintains correct structure and proportions and helps prevent unwanted variations so that all views align.
It works best for structured, realistic poses, but you can adjust it for more stylized or exaggerated designs. If features shift too much between poses, increase the pose influence to maintain better control.
A well‑structured prompt improves accuracy and consistency.
For example, "Character design sheet: a stylized 3D man in futuristic exosuit armor with glowing blue accents, short dark hair, stern expression, shown in orthographic front, side, and back views with consistent lighting."
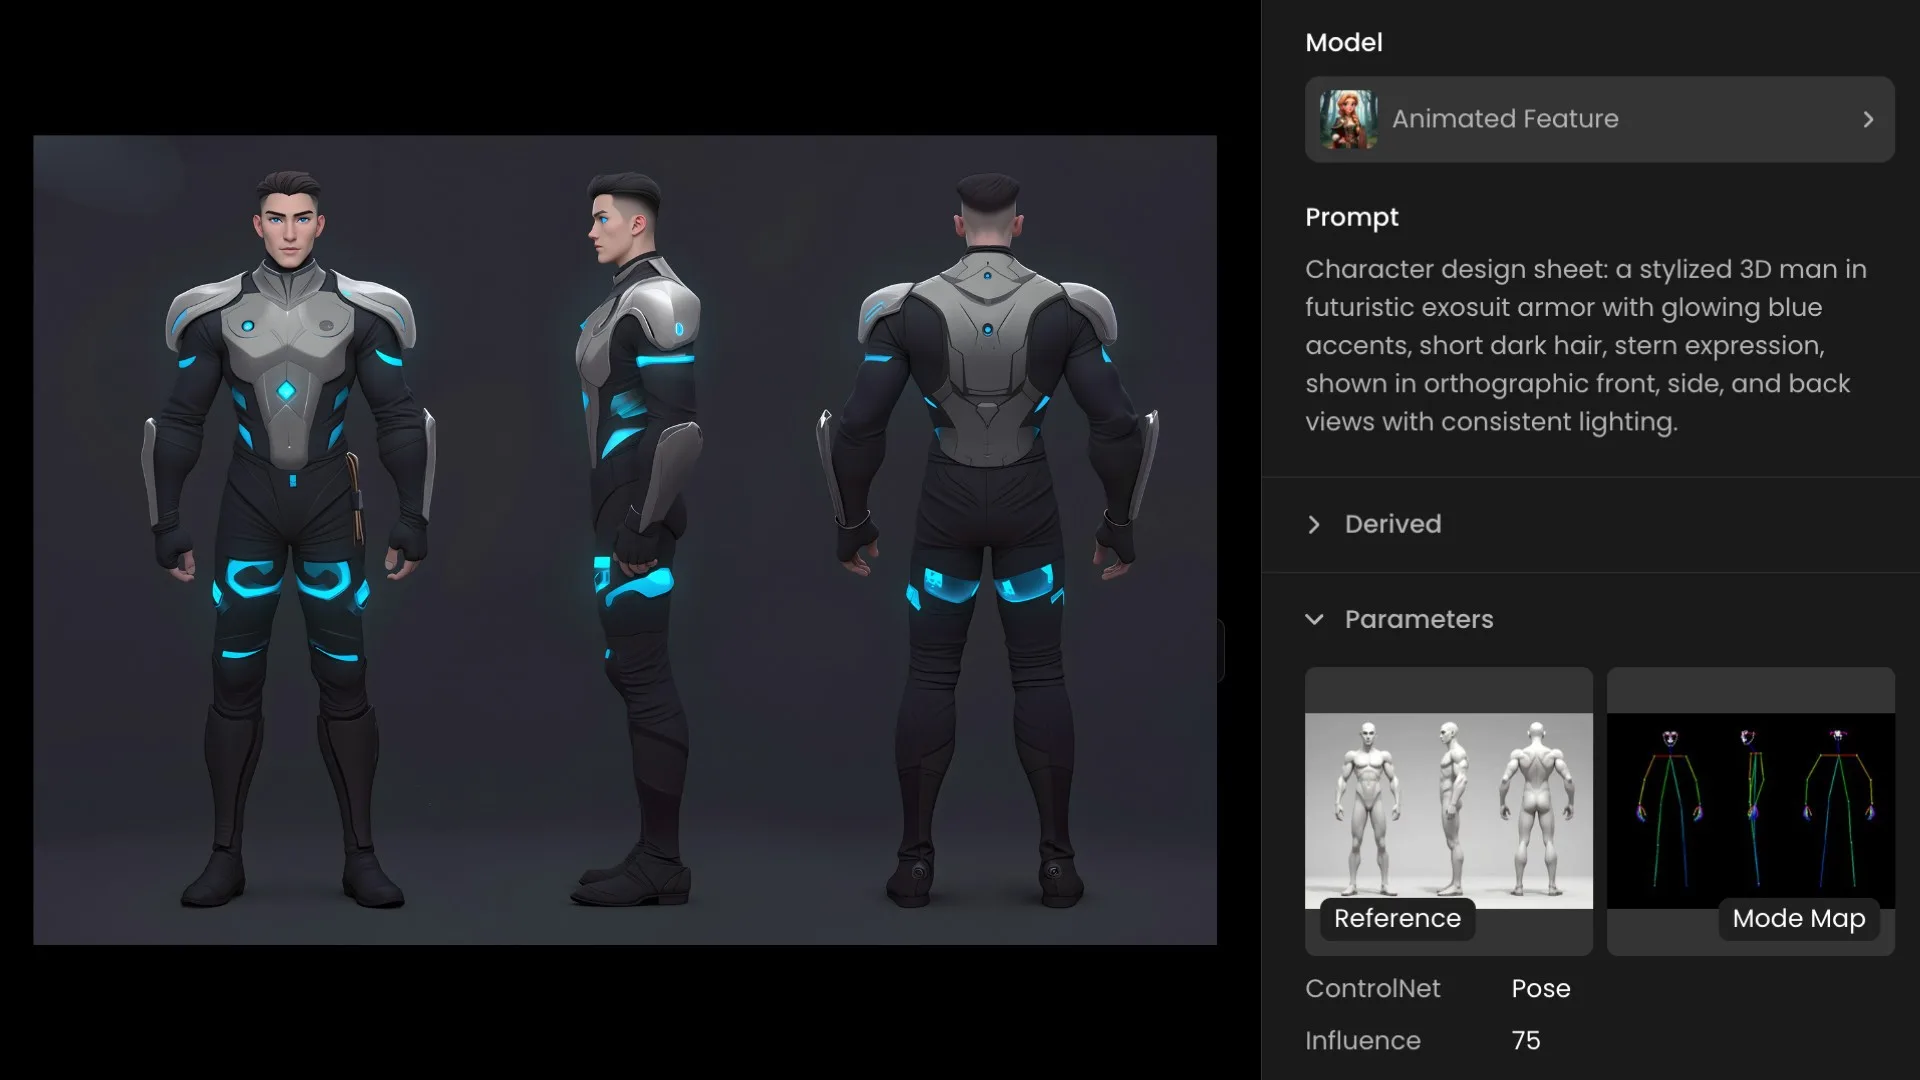
ControlNet Pose mode For Character Turnarounds
Final Touches
Once the turnaround is generated, Retouch allows for precise refinements. If small inconsistencies appear between views, such as slight facial changes or variations in outfit details, correct them using masking and inpainting tools. Focusing on specific areas like facial features or hands helps ensure everything stays aligned. Using Retouch for targeted corrections is especially useful for polishing final details and ensuring that all poses match visually before exporting the turnaround.
Complete your turnaround by increasing quality and resolution. Use Scenario Enhance to upscale your final character sheet 2× to 16× depending on your needs. This step is important for professional‑grade character sheets that might be used as reference by multiple artists or developers.
Conclusion
To wrap up, choose the path that matches your goal: use Edit with Prompts when you need speed from a strong base image, go with a custom‑trained character model and ControlNet for perfect consistency across views, or capture a Pixverse v5 rotation to extract aligned frames with zero camera drift. Finish every sheet with quick touch‑ups if needed and an upscale so your turnaround ships clean, consistent, and production‑ready.
Get started: Edit with Prompts • Pixverse v5 • Custom models
Frequently asked questions (FAQs)
Should I sketch a reference or upload one?
Sketch when you do not have a turnaround reference and want quick structure. Upload when you have a clean front‑side‑back reference or a model sheet. Both give the AI a structural foundation; the choice is mostly about what you already have.
What goes into a good prompt for turnarounds?
Structure prompts into three parts: optional style, clear character description, and a technical clause like "character design sheet with multiple views (front, side, back), orthographic camera, consistent lighting." Keep each run focused.
How long should the Pixverse v5 clip be?
About five seconds at 720p or 1080p is enough to capture front, three‑quarter, side, and back frames cleanly.
How do I fix small inconsistencies between views?
Open Retouch and use masking and inpainting to retouch specific areas like facial features, hands, or accessories. Then upscale with Enhance (2× to 16×) to finalize edges and textures without introducing creative drift.
Can I use these methods for props, outfits, or tiles?
Yes. The same structure‑first approach works for characters, props, buildings, and isometric tiles; just keep proportions and key shapes locked with ControlNet and targeted prompts.