Train a Flux Kontext LoRA in Scenario: Your Very Own Editing Model
A clear guide to training Flux Kontext LoRAs in Scenario — from curating training pairs and writing great instructions to monitoring epochs and putting your model to work.

Train a Flux Kontext LoRA in Scenario: Your Very Own Editing Model
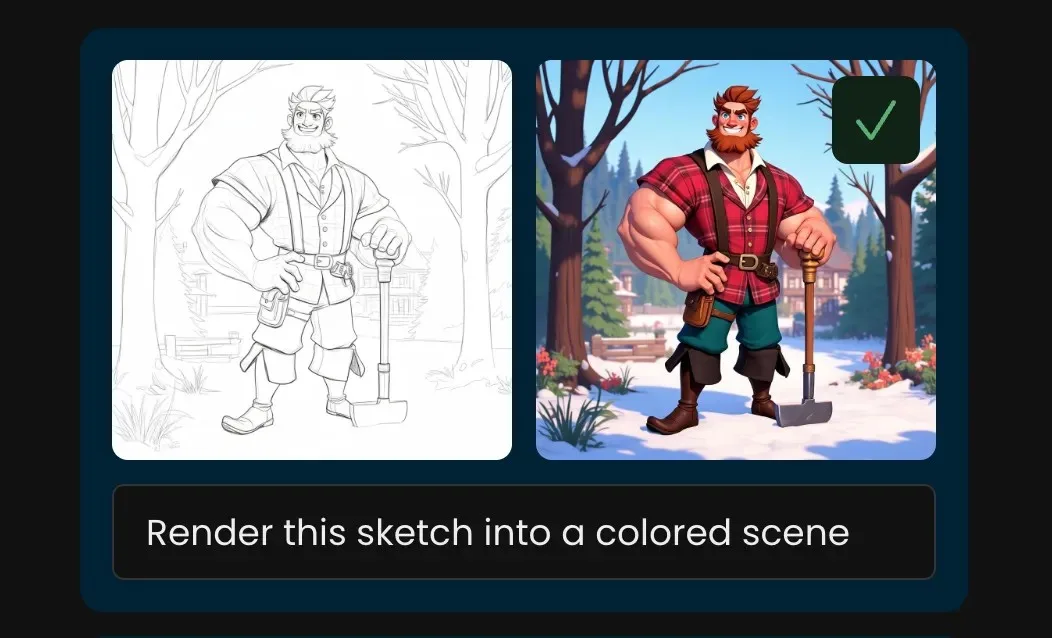
Flux Kontext LoRAs introduce a new way to teach precise image edits - not just a style, but the transformation itself. By pairing a “before“ image, an “after” image, and a short instruction, you can train a model that applies the same change to new inputs with consistency and control.
In short: Flux Kontext learns how to go from A to B on command.

Sketch to Full-color Image On Scenario Using Flux Kontext Model Training
What makes Flux Kontext different?
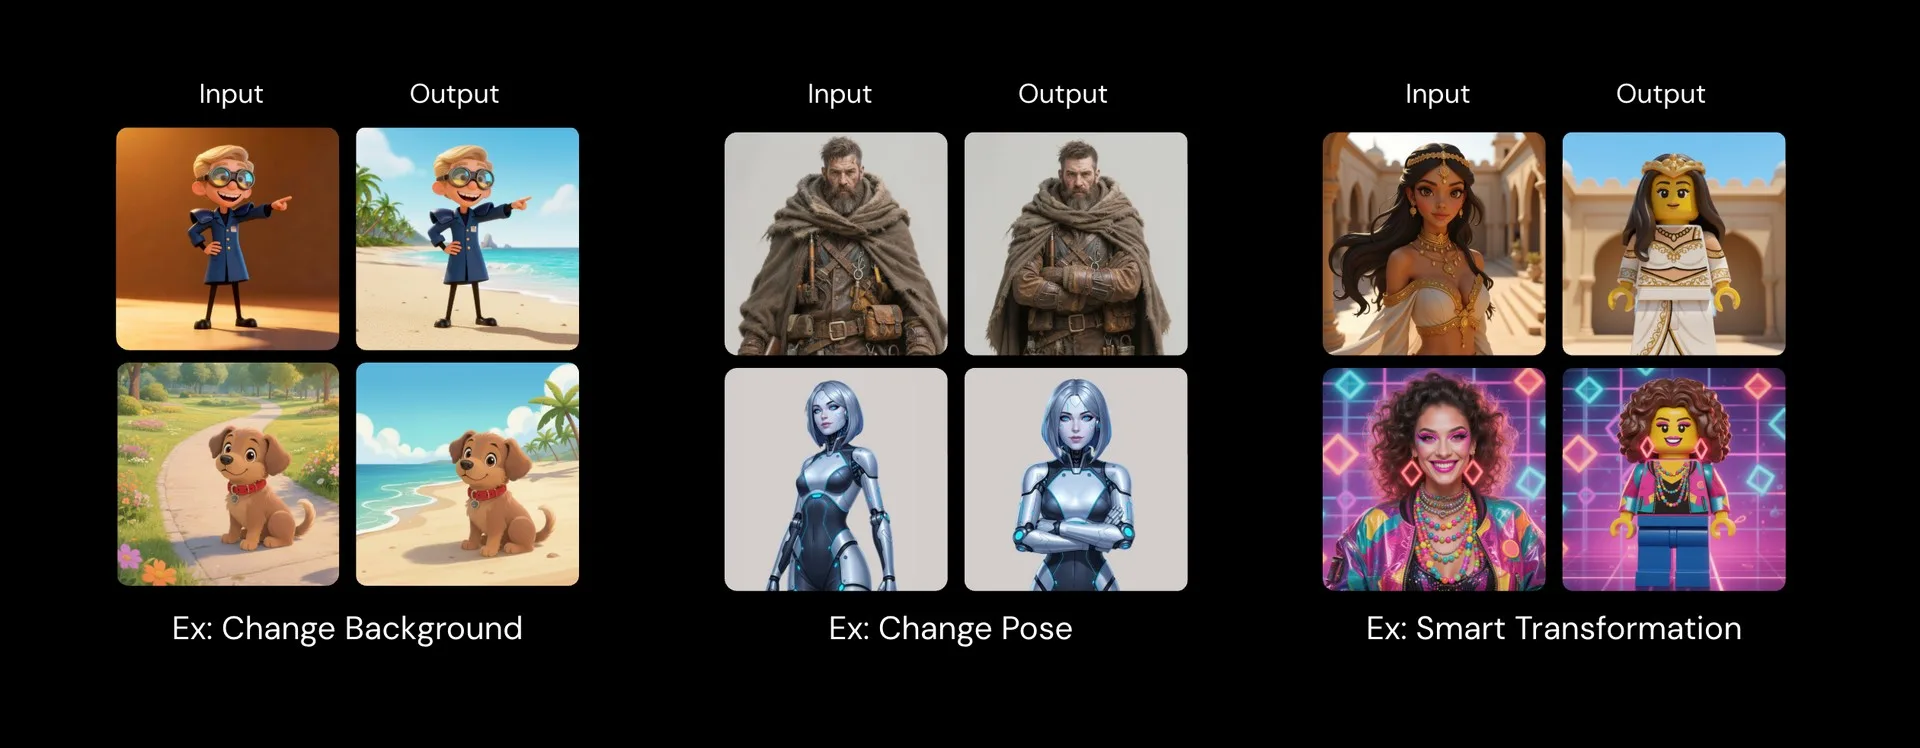
Classic style LoRAs learn appearance. Flux Kontext learns actions. It understands your source image and applies an edit based on your text instruction plus the visual example from your training pairs. This enables subtle, targeted changes - lighting shifts, style transfers, proportion tweaks - while preserving the core subject. This is extremely powerful, as it means you can train a model that really gets the exact kind of transformation you want on an image - even those very specific edits that base models like Nanobanana, Seedream Edit, or Qwen Edit can’t easily handle.
The core concept: training inputs
Training inputs consist of three parts: Before/Input (the original image), After/Output (the edited result you want), and Instruction/Caption (a short, imperative line that explains the change).
Keep captions instructional. Think verb + outcome. For example:
- “Render the sketch into a full-color animated scene”
- “Apply [BrandName]’s lighting and color palette.”
- “Replace the person with [MyCharacter].”
- “Convert this scene into [MyStudio] architectural style.”
Flux Kontext Model Training Pairs and Caption
What makes good training data?
Start with a clear transformation between pairs, where the difference between the before and after images is focused and intentional.
Make sure the level of consistency across the output images in your training data matches the level of consistency you want the model to produce when generating results.
To support this, use high‑quality inputs at 1024×1024 or higher with clean, sharp visuals and ensure instruction clarity by describing the transformation plainly and specifically between the input and output image.
Flux Kontext Training Pairs
Step‑by‑step: train a Flux Kontext LoRA
Step 1: Open Flux Kontext training
Go to Create → Train → Start Training → Kontext, then click Next.
Step 2: Curate and upload your dataset
Prepare 5–20 pairs if possible. Upload or pull them from your Scenario library, then organize them into two sets by dragging and dropping them into the assigned slots.
Before / Input images are your original, unedited images, and After / Output images are what the image should look like if the instruction were applied to the input.

Flux Kontext Model Training Dataset
Step 3: Caption your pairs
Before tuning parameters, caption every pair with a clear instruction. You can reuse the same caption across all pairs or tailor slightly per pair - just keep the intent and wording consistent.
Be brief and direct; use action verbs like add, transform, convert, apply, and relight. If you include a trigger word, repeat it exactly the same way in every caption.
Step 4: Set test prompts and inputs
Use up to four test slots to monitor progress across epochs. For each slot, upload a new input image that is not in your training set and provide a short instruction that matches or closely mirrors the one used in training.
Scenario will generate previews at each epoch so you can compare side by side and select the best checkpoint.
Step 5: Start and monitor training
Training typically takes 30–45 minutes to a few hours depending on dataset size and settings. Watch preview outputs evolve each epoch and check that the transformation is learning as intended.
Step 6: Evaluate epochs and choose the best
Open the epochs viewer. Select two epochs and click Compare to review side by side. The last epoch is often best for consistency, but earlier epochs can feel more flexible. Set your preferred epoch as default from the three‑dot menu.

Flux Kontext LoRAs Training Epochs
Step 7: Use your trained model
At the end of training, your new Flux Kontext LoRA will be saved directly in your Scenario account, ready to use as an editing model.
This means you’ve turned a LoRA into a personalized editing tool, one that understands the exact type of transformation you trained it on and can now reproduce it on entirely new images, guided by your text instructions.
To access it, simply click “Use This Model”, or go to the “Edit with Prompts“ interface, and load the model into the panel on the left.
When using your new LoRA:
- Upload a new image similar to your training inputs
- Enter an instruction that matches your caption style
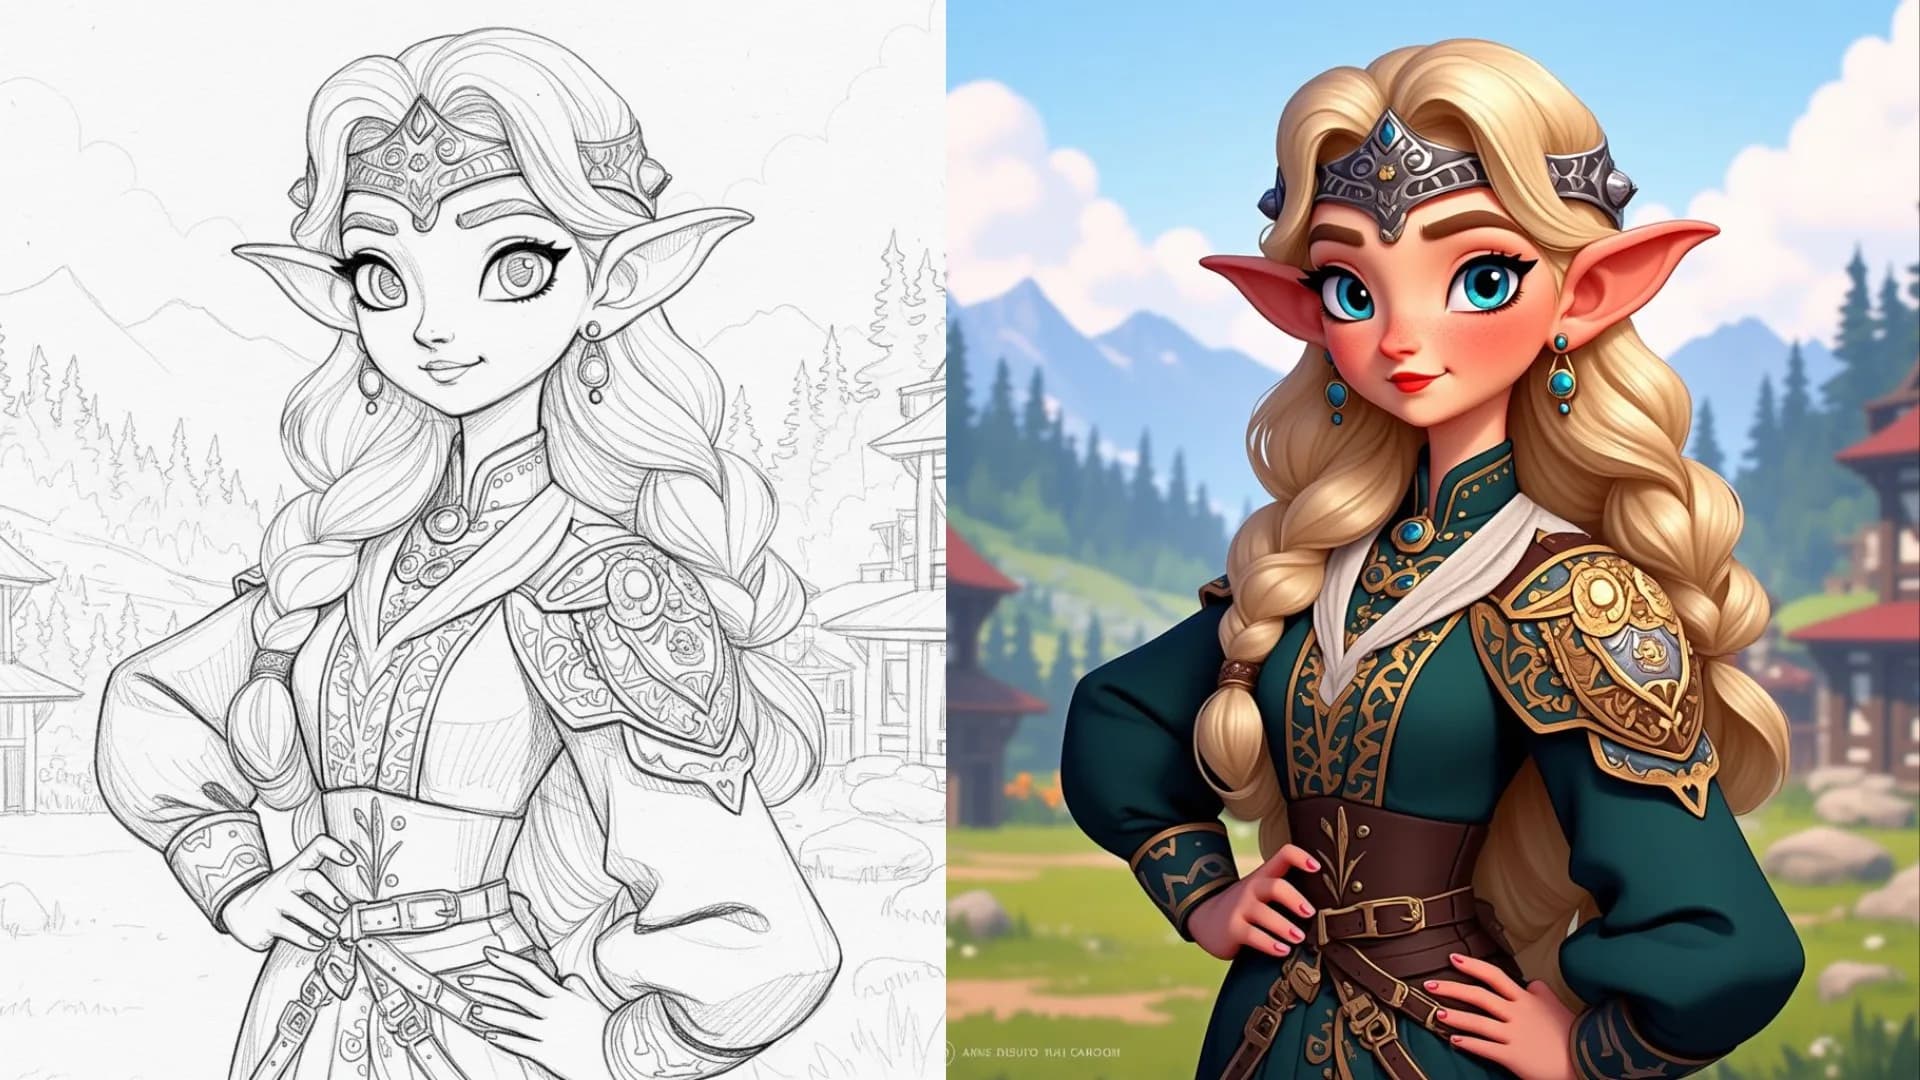
Sketch to Full-color Image On Scenario Using Flux Kontext Model Training
Ready to apply your transformations? Open Scenario to start training
Frequently asked questions (FAQs)
Do I need trigger words?
No. They’re optional. Use them for explicit activation or when mixing multiple learned behaviors.
How do I track quality during training?
Use the four test slots. You’ll get preview outputs each epoch to compare progress.
How do I pick the right epoch?
Use the side‑by‑side compare tool. Later epochs are often most consistent; earlier ones may generalize more.