Turn Any Image Into Pixel Art With Scenario
A practical guide to Scenario’s Pixelate tool, from grid size to palette control, so you can go from photo to crisp, consistent pixels with confidence.
Turn Any Image Into Pixel Art With Scenario
If you’re aiming for pixel art that looks clean and consistent across a set, you’re in the right place. We’ll cover the complete process, from choosing grid size to palette control, so your outputs are crisp, repeatable, and on style.
Why Pixelate
Pixel art isn’t just nostalgic. It’s a deliberate visual style prized for its clarity, charm, and expressive simplicity. Scenario’s Pixelate tool gives you control over the two levers that matter most, the pixel grid and the color palette, and adds helpful finishing touches like noise cleanup and background removal. The result is a fast, repeatable path to sprites, posters, avatars, and UI elements that feel coherent across a set.

A banner Showing Pixelated Characters
How it works
Open any image in Scenario and select Pixelate from the three‑dot menu, or launch it from the main top menu under Create then Pixelate. You can also head straight there: Open Scenario.
Pixelate converts your input into a grid and maps colors to a defined palette. You control how retro or detailed it feels just by adjusting the grid and palette.
Pixelated Character Made on Scenario
Set up your first conversion
Start with a clear, high‑resolution source (1024×1024 or higher). Load the image from your Library or drag it in. Then choose the grid size: 16 or 32 pixels per cell for a bold, game‑sprite look, 64 for a balanced middle ground, or 128–256 to keep more fidelity while still reading as pixelated. This choice has the biggest visual impact.
Next, tune the palette. By default, Pixelate extracts a palette from your image, which is a great starting point. If you want a consistent look across many assets, switch to a custom palette. Add swatches with the picker or paste hex codes, and save the palette so you can reuse it later. In practice, a limited set of 8–12 colors gives you that authentic retro feel with strong separation between shapes; a larger set (16+) preserves more shading and texture when you need it.
Finally, apply finishing touches. Remove Noise smooths away stray pixels and jitter on busy inputs, which helps sprites read cleanly at small sizes. Remove Background isolates the subject for transparent assets, perfect for engines and layout work.
Click Pixelate to generate your result. Review the output and iterate: nudge the grid up or down, tighten the palette, toggle cleanup. Within a few passes you’ll have a look you can replicate.

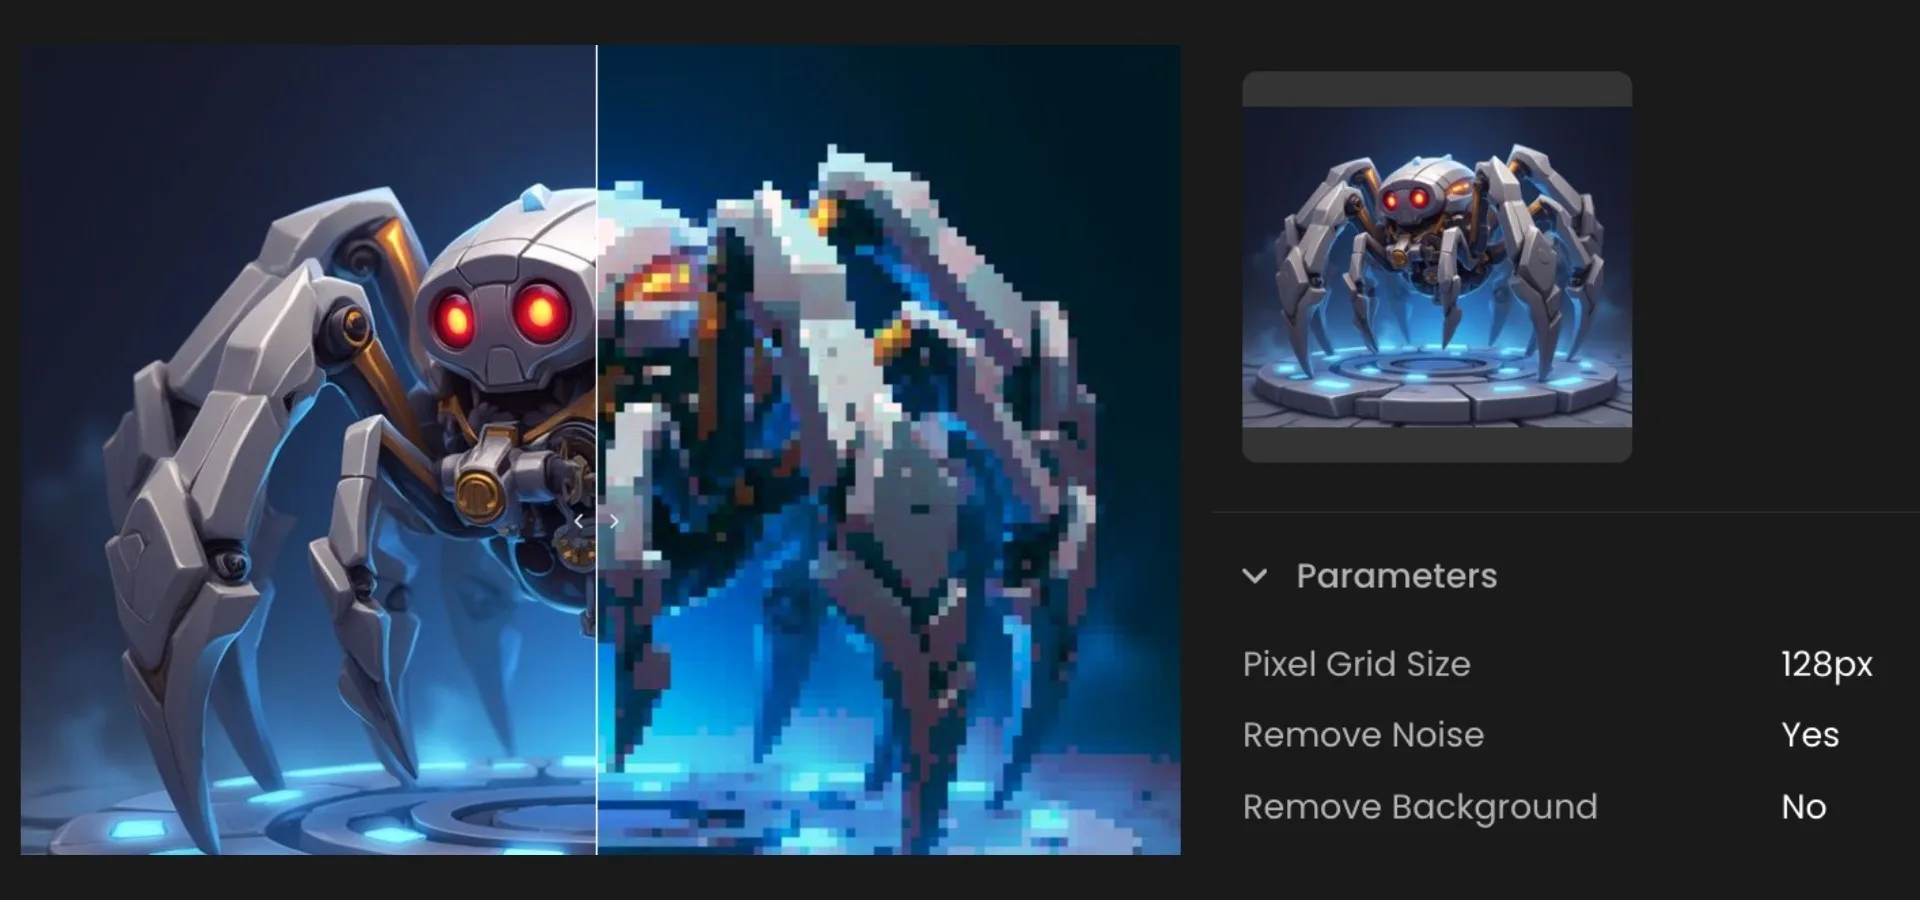
A Pixelated Character On Scenario
What good results look like
For game assets, a 32‑pixel grid with an 8‑color custom palette and background removal yields tidy, drop‑in sprites. For posters or social visuals, a 64‑pixel grid and a vibrant 16‑color palette strike a nice balance between retro texture and graphic punch. For portraits and avatars, a 128‑pixel grid with a brand‑matched palette plus noise removal keeps faces recognizable while staying stylized. The key is consistency: once you like the look, lock those settings and reuse them.
Pixel art shines when it’s consistent across a set. If you are producing a run of icons, character frames, or tiles, keep the same grid size and palette across every image. That discipline is what makes a collection feel intentional. Save your palette, note your grid, and stick to them for the rest of the batch.

Consistent Pixelated Collection Of Characters Made on Scenario
Conclusion
Pixelate gives you speed and control where it matters: grid size and palette discipline.
With a few deliberate choices, you can turn any input into readable, reusable pixel art, from production‑ready sprites to stylized marketing visuals, and keep that look consistent across an entire project.
Ready to build a full set of pixel-perfect assets? Start Pixelating: Open Scenario.
Frequently asked questions (FAQs)
What grid size should I start with?
Begin at 64 pixels per cell. If you want a stronger retro feel, step down to 32. If you need more fidelity, step up to 128.
How many colors should I use?
Start with 8–12 for a classic retro feel. Use 16 or more if you need smoother gradients or richer detail.
When should I use Remove Noise?
Use it on busy photos or detailed textures. It removes stray pixels and helps shapes read clearly at small sizes.
Can I keep a consistent look across a big set?
Yes. Save your palette, record your grid size, and use the same settings for every asset. That’s the fastest path to a cohesive system.